

Cabinet Door Gasket Stops Air Leaks
Key Takeaways About Cabinet Door Gasket
A cabinet door gasket is a flexible seal that blocks air drafts dust and noise at cabinet seams. This summary helps homeowners and property managers decide when to inspect or replace seals during seasonal HVAC changes.
- Identify visible gaps drafts or compressed seal material around doors.
- Prevent dust buildup and filter clogs by restoring a tight seal.
- Avoid short cycling and pressure swings with proper sealing.
- Spot vibration whines or rattles that signal failing seals.
- Reduce indoor dust transfer and noise with correct gasket fit.
- Plan professional diagnostics when mold dampness or persistent leaks appear.
Introduction
Cabinet door gasket failures are a quiet but costly household problem that often goes unnoticed. Worn gaskets let air slip through gaps, carrying dust into cabinets and rooms. That airflow can make HVAC systems work harder to keep temperatures steady. Left unchecked, the issue raises noise, indoor dust levels, and energy waste.
Homeowners often notice rattling or a faint whistling near cabinets before seeing dust build up. These sounds point to an imperfect seal around doors or panels rather than a cosmetic defect. Over time the gasket material compresses, cracks, or detaches and loses its ability to block airflow. Addressing the gasket restores the seal that keeps conditioned air where it belongs.
Dust entering through cabinet gaps worsens indoor air quality and leaves residue on stored items. Increased dust can show up as streaks, cobweb-like deposits, or frequent filter clogs in HVAC return grilles. Noise from vibrating doors or cabinet faces also becomes more noticeable in quiet homes. Replacing worn gaskets improves both cleanliness and comfort in everyday living spaces.
For properties in Aledo, TX and homes near Grapevine, TX, these symptoms often coincide with seasonal heating and cooling changes. A professional inspection will confirm whether the gasket is the cause or if another component like the return grille or door hinge needs attention. Technicians check seals, door alignment, and airflow patterns during a diagnostic visit. That step determines the right fix and prevents recurring leaks and noise.

What A Cabinet Door Gasket Does And How It Works
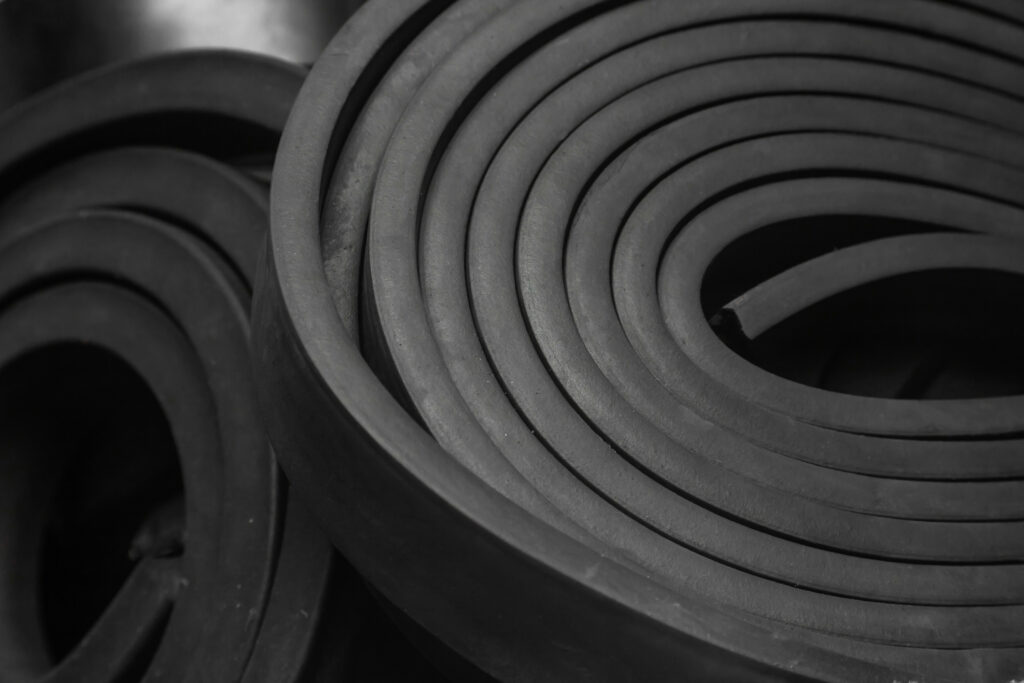
A cabinet door gasket is a flexible air seal that fills gaps around cabinet doors to block airflow, dust, and noise. It presses against the door frame when closed to form a continuous barrier. Gaskets come in foam, rubber, or magnetic types tailored to different cabinet faces and uses. Proper material choice affects longevity, compression recovery, and how well the seal resists air movement.
- Foam gaskets compress to fill uneven gaps.
- Rubber strips resist tearing and handle repeated use.
- Magnetic gaskets snap closed for metal cabinets.
- Adhesive-backed gaskets stick to clean surfaces.
The gasket works by creating a narrow resistance path that breaks up pressure differences between cabinet interior and room air. That resistance reduces small steady airflow that carries dust into storage spaces. For homeowners wondering whether a loose gasket actually affects comfort, the answer is yes because leaks change air movement near returns and supply grilles. Technicians often trace these leaks with simple smoke tests or hand-held airflow checks during inspection.
Professionals diagnose gasket problems by observing door alignment, feeling for drafts, and checking for transferred dust at edges. They may use an infrared camera to spot temperature differences or a smoke pencil to reveal the leak path. Simple checks include closing the door onto a sheet of paper to test grip and running a finger along seams to feel airflow. Addressing the gasket restores the intended barrier, which helps reduce dust, noise, and conditioned-air loss.
In some cases the gasket issue links to broader duct or return problems that affect room pressure and airflow balance. If a home in Aledo, TX shows persistent cabinet drafts despite new gaskets, a technician might inspect ducts or return grilles next. For properties near Grapevine, TX, coordinated checks of cabinet seals and HVAC return pathways can reveal whether airflow comes from the duct system or the cabinet itself. For related work on sealing HVAC leaks, see duct sealing in Colleyville.
Common Causes Of Worn Cabinet Door Gaskets
Everyday wear and tear shortens a cabinet door gasket’s lifespan through repeated opening and closing motions. Hinges that sag or misalign put extra shear stress on the gasket material each time the door moves. Constant rubbing flattens foam or wears thin rubber, reducing its ability to spring back and hold a tight seal. Visible compression lines, fraying edges, or areas where the gasket no longer contacts the frame point to mechanical stress rather than aging alone.
Environmental factors also speed gasket breakdown when cabinets sit near heat, sunlight, or humidity sources. High temperatures make rubber brittle and more prone to cracking during normal use. Moisture can swell some gasket adhesives and cause detachment or mold growth along the seal edge. For homes in Aledo, TX where attic heat can transfer to enclosed cabinetry, seal materials resistant to heat and humidity perform better over time.
Chemical exposure is a less obvious cause that homeowners sometimes overlook when cleaning inside cabinets. Strong solvents, oils, or harsh detergents can degrade foam and adhesive backings, causing softening or loss of tack. Stored products that off-gas volatile compounds will attack gasket compounds slowly, leaving sticky residues or a crumbly surface. Inspecting stored items and changing cleaners can reduce this silent chemical wear before replacement becomes necessary.
Poor installation or the wrong gasket type accelerates failure and leads to recurring leaks, dust intrusion, and noise. Adhesive-backed strips placed on contaminated or uneven surfaces will peel away under normal pressure. Magnetic or heavy-duty gaskets fitted to lightweight cabinet faces can bend the door edge and pull the seal loose over time. A professional inspection will check material choice, adhesive condition, and mounting surface to confirm whether replacement or repositioning solves the problem.
In a common situation, homeowners notice fine dust inside closed cabinets while HVAC return grilles collect extra debris near doors, a tech would examine gasket contact, door alignment, and airflow patterns next. Simple diagnostic steps include using a smoke pencil or tissue at seam edges to reveal leaks and taking photographs to document detached sections for repair planning. If airflow appears to come from duct pathways rather than the cabinet itself, consider also scheduling duct cleaning to remove trapped dust and improve overall indoor air quality.
Warning Signs Your Cabinet Door Gasket Needs Replacing
Look for gaps you can see when the door is closed, small light streaks along the edge indicate a broken seal and escaping air. Run a hand slowly around the seam to feel drafts without touching stored items or wiring. If doors begin to vibrate or produce a steady whine when HVAC fans run, that mechanical noise often ties to uneven gasket contact or detached sections. In Aledo, TX homes, seasonal pressure changes can make these sounds more noticeable in quiet rooms.
Check for new dust patterns inside cabinets that differ from general household dust distribution, targeted streaks or concentrated piles near seams point to gasket leaks. Inspect adhesive edges for flaking or areas where foam no longer compresses against the frame during closure. Doors that require multiple latches or a firm push to stay shut suggest compression set or material fatigue in the gasket. For homeowners near Grapevine, TX, frequent humidity swings can make adhesive-backed seals fail sooner than expected.
Peel back a short section of gasket only if adhesive will tolerate it, look for crumbling, brittleness, or mold growth underneath that indicates material breakdown. Use a simple smoke source or a tissue at the seam to reveal airflow paths if visible cues are weak, and document the leak locations for a technician. A professional will check door alignment, hinge wear, and gasket contact pressure with basic tools like a straightedge and feeler gauge to confirm the diagnosis. They may also pair that inspection with indoor air tracking, including services like air quality monitoring in HVAC, when dust or allergens are a concern.
Watch for adhesive residue on cabinet faces or gasket sections that shift out of place after cleaning, which shows loss of tack and likely imminent detachment. Repeated bowing of the door where the gasket used to seat indicates the material no longer supports even contact across the frame. If you notice odors or damp spots under the gasket, stop using chemical cleaners and call a professional, since mold or trapped moisture raises health concerns. A timely inspection confirms whether a simple reglue, repositioning, or full gasket replacement solves the problem.
How Replacing Gaskets Reduces Noise And Dust
Replacing a worn cabinet door gasket stops small steady air movements that carry fine dust into storage spaces. New seals interrupt pressure-driven leaks that create a soft, continuous whoosh or rattle when HVAC fans run. Installations that restore continuous contact reduce turbulent airflow near hinges and edges, which lowers the tiny particles stirred into the air. Technicians often confirm improvement by observing quieter cabinet faces and less dust buildup after replacement.
- Seals reduce air velocity at door seams.
- They prevent pressure imbalances that draw dust inside.
- New gaskets stop vibration-related rattling.
- Proper fit keeps doors from flexing and whistling.
Replacing gaskets also cuts indirect noise linked to HVAC operation and return grilles in adjacent rooms. When leaks vanish, the system faces fewer pressure fluctuations that can make ducts and doors hum or buzz. A professional will check the return grille, supply registers, and cabinet alignment during diagnosis to trace remaining noise sources. That combined check helps confirm whether the gasket swap resolved the issue or if further duct balancing is needed.
Homeowners might notice less visible dust on shelves and fewer clogs in return filters within weeks after replacement. In Aledo, TX homes, seasonal pressure swings often worsen dust intrusion, so a fresh seal shows quick benefits during those changes. For properties near Grapevine, TX, pairing a gasket replacement with indoor air monitoring can quantify dust reduction and confirm quieter operation. Consider scheduling an evaluation that includes both seal inspection and air checks to document results at the next service visit to HVAC in air quality management.
Energy Savings From Properly Sealed Cabinet Doors
Properly sealed cabinet doors reduce conditioned air loss by stopping uncontrolled leaks that change room pressure during HVAC cycles. When leaks close, the system maintains target temperatures with fewer runtime cycles and steadier thermostat readings. HVAC components such as the blower motor and supply plenum see reduced on-off cycling stress when pressure stays balanced. This change contributes to longer component life and steadier indoor comfort throughout the day.
Sealing cabinet gaps also reduces how often return grilles pull dust-laden air into the system, improving filter performance between changes. Better filters and steadier airflow lower particulate carryover that forces fans to run harder to maintain setpoints during extreme outside temperatures. Technicians often pair gasket inspections with return grille checks and simple airflow measurements to confirm reduced leakage. These paired checks help verify improvements after a new gasket seats fully around the door frame.
Homeowners in Aledo, TX may notice the system runs with fewer short cycles after seals get replaced, especially during seasonal transitions. For properties near Grapevine, TX, a clear improvement shows when temperature swings no longer produce whistling or pressure-driven drafts at cabinet seams. A professional diagnostic would include a visual seal inspection, a smoke test at seams, and basic supply and return temperature checks. Those steps confirm whether the gasket replacement fully restored the barrier and reduced conditioned-air loss.
To see measurable benefits, combine a proper gasket replacement with other simple air-sealing steps around returns and duct penetrations. For guidance on reducing overall system load and measuring gains, consult a service that focuses on duct and system efficiency like reducing HVAC energy consumption. A technician can produce a brief report showing pre- and post-inspection observations, airflow checks, and visible improvements helpful for tracking energy use and comfort over time.
Step By Step DIY Replacement Process For Homeowners
Gather the right materials before you begin: replacement cabinet door gasket sized to the frame, a utility knife, rubbing alcohol, a clean cloth, and a straightedge for trimming. Clear the cabinet contents and open the door fully so you can access the seal without obstruction. Remove the old gasket slowly, peeling adhesive-backed sections while watching for stuck fragments that could interfere with the new seal. Dispose of the old material safely and clean the surface with rubbing alcohol to remove oils and adhesive residue.
Measure the perimeter of the door frame carefully and cut the new gasket slightly longer than needed to ensure full coverage at corners. Dry-fit the gasket without removing the backing first so you can confirm corner fit and contact pressure against the door face. If the gasket uses adhesive backing, score the backing in short sections and press each piece firmly as you go to avoid misalignment. For mechanical or magnetic gaskets, follow the manufacturer’s clip or screw pattern and check that the door closes without binding.
After installation, run a simple diagnostic check to confirm the seal: close the door on a sheet of paper and try to pull it free, feeling for even resistance around the frame. Use a smoke pencil or a lit incense stick held near seam edges while the HVAC fan runs to spot any remaining leak paths. If you find gaps, loosen and reposition the gasket or add small shim adjustments at hinges to improve contact. Take photos of the finished work to document gasket placement and any areas that required extra adjustment for future reference.
If noise persists after a tight seal, consider inspecting adjacent components like hinges, latch hardware, and nearby return grilles since they can radiate or transmit sound through the cabinet face. A professional can perform more involved checks, including simple vibration damping and room pressure tests, and advise on long-term solutions for noise control. Homeowners in Aledo, TX and properties in Grapevine, TX should schedule a diagnostic if drafts or persistent sounds continue despite a new seal. For additional guidance on managing residual sound sources, review practical suggestions in our HVAC noise management tips.
When To Call A Professional For Gasket Service
If gasket problems continue after DIY attempts, call a technician who can perform a full diagnostic inspection and confirm causes. A professional will check door alignment, hinge wear, and gasket contact using simple tools like a straightedge and feeler gauge. They can also run a smoke test or infrared scan to find hidden leaks that DIY checks might miss. For persistent vibration or whistling, a trained tech can trace whether the cabinet or nearby HVAC components drive the noise.
- Inspect door alignment and hinge mounting.
- Check gasket adhesion and material compatibility.
- Perform smoke or airflow tests at seams.
- Evaluate nearby return grille and duct interactions.
- Document findings with photos and notes.
Call a pro when you spot mold or dampness under the gasket, as that may point to trapped moisture or hidden leaks. Technicians will remove sections safely, inspect for mold, and recommend remediation steps while avoiding spread during the procedure. If odor accompanies the damp spot, they may sample or advise air quality monitoring before reinstallation. In such cases, professionals follow containment practices to protect indoor air during work.
Schedule service if repeated gasket replacements fail, since underlying issues like warped doors or duct pressure problems can cause repeat failure. A technician will assess door flatness and hinge torque and check room pressure relative to nearby returns and supplies. They can coordinate a duct inspection or recommend actions to maintain sealing long term. For homes in Aledo, TX or properties around Grapevine, TX, technicians often pair gasket checks with broader sealing programs and can advise on maintaining overall airflow integrity, referencing services to maintain HVAC duct integrity when appropriate.

Tips To Prevent Future Cabinet Door Gasket Damage
Keep cabinet door gasket material clean by wiping seals monthly with a mild, non-solvent cleaner and a soft cloth to remove dust buildup. Avoid abrasive scrubbing that can nick foam or rubber and damage the adhesive backing over time. Inspect adhesive edges after cleaning and press any lifted sections back into place to restore contact. If you spot persistent tack loss, plan a follow-up inspection rather than repeated aggressive cleaning methods.
Limit exposure to heat and direct sunlight near cabinet faces to slow gasket aging and brittleness, since elevated surface temperatures weaken rubber compounds. Reposition heat-generating appliances or install small ventilation paths to reduce trapped warm air in enclosed cabinetry. Check stored products for solvents or oily residues that release vapors which attack gasket compounds. Rotate stored items periodically to catch chemical damage before it causes seal failure.
Adjust door hardware to reduce shear on the cabinet door gasket by tightening hinges and testing latch alignment for even pressure across the seal. Use a straightedge and small shims behind hinge plates if doors show bowing that causes point loads on the gasket. Test sealing with a sheet of paper at several points around the frame to confirm uniform grip and adjust hardware until resistance feels even. Regularly lubricate hinge pins to prevent sudden sag that stresses the seal.
Monitor indoor humidity levels and address persistent dampness since moisture can lift adhesives and promote mold under the gasket, consider a dehumidifier in problem rooms. For homes in Aledo, TX higher humidity swings during certain seasons can worsen adhesive loss, so check seals after seasonal changes. Pair gasket upkeep with periodic energy audits to find other leakage paths that affect room pressure and cabinet sealing, see energy audits enhancing HVAC efficiency for coordinated checks. If you detect mold, trapped moisture, or repeated failures, contact a professional to inspect and recommend remediation steps safely.
Frequently Asked Questions
How does a cabinet door gasket reduce dust entry?
A cabinet door gasket seals gaps around doors so fewer airborne particles enter the cabinet interior. By blocking drafts, the gasket stops dust carried on air currents from settling on stored items. A tight seal also reduces noise that stirs dust and limits vibration that releases settled particles. If gaskets are brittle or damaged, replace them promptly or contact a professional to avoid improper sealing and potential damage.
What signs show a cabinet door gasket needs replacing?
Look for visible gaps, crushed or missing material along the cabinet edge that let light or air pass through.
Listen for new rattling or whistling when HVAC runs or wind moves around the cabinet doors.
Find increased dust accumulation, drafty spots near hinges, or uneven door contact during a simple visual check.
If seals look brittle or moldy, exercise caution and consider calling a professional to inspect and replace the cabinet door gasket safely.
Can replacing the gasket lower HVAC noise and cycling?
Yes, replacing a worn cabinet door gasket can reduce HVAC noise by sealing gaps around equipment panels and duct access points. When gaskets leak, air pushes through small openings and causes whistling or rattling that the system amplifies. A tight gasket can also improve airflow balance, which helps prevent short cycling caused by pressure imbalances and thermostat hunting. If panels are near electrical components or gas lines, exercise caution and hire a trained technician to inspect and replace the gasket safely.
How do professionals diagnose cabinet seal leaks?
Technicians start with a visual inspection of hinge gaps, gasket compression, and visible wear around the cabinet door gasket.
They use a flashlight and feel for drafts while listening for whistling or rattling at different door positions.
A smoke pencil or incense helps trace small leaks, and technicians may record thermal images or airflow readings if needed.
If inspection involves electrical panels or gas appliances, stop work and recommend a licensed pro for safety before proceeding.
What materials last longest for a replacement cabinet door gasket?
EPDM rubber and silicone gaskets typically last the longest for cabinet door gasket use because they resist compression set and UV degradation. Neoprene also holds up well when oil or mild solvents contact the seal. Metal-backed or magnetic door seals provide durable, long-term contact on heavier cabinet doors. If seal replacement involves electrical panels or gas appliances, stop and call a professional to avoid safety risks.