

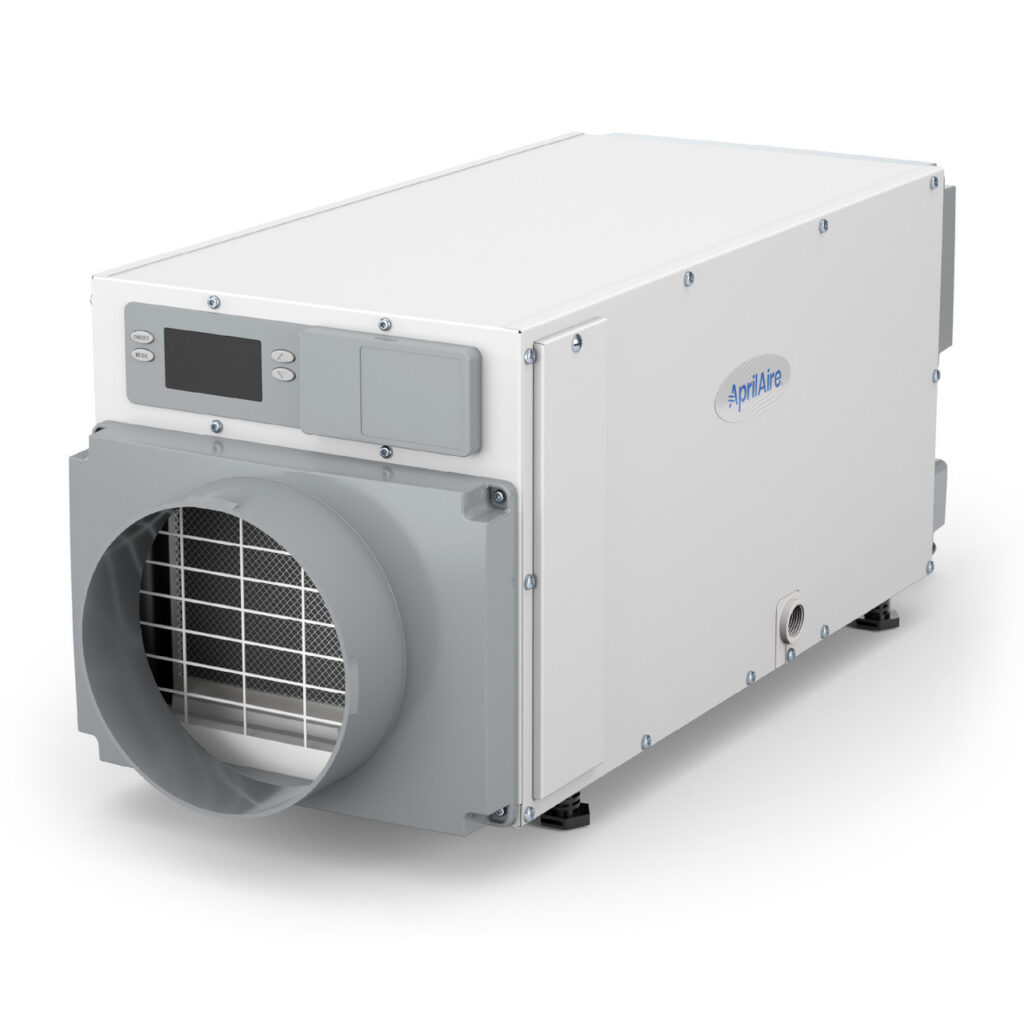
Crawlspace Dehumidifier Install Steps That Last
Key Takeaways About Crawlspace Dehumidifier Install
A crawlspace dehumidifier install places a dehumidifier, routes condensate, and sets controls to manage moisture. This guide is for homeowners and property managers who need reliable moisture control and want to prevent damage now and with seasonal changes.
- Identify correct central placement for even airflow and service access.
- Prevent condensate pooling by choosing gravity drain or pump correctly.
- Avoid sensor placement near exhaust to prevent false humidity readings.
- Spot hidden moisture with moisture meter and visual inspection checks.
- Reduce freeze and coil issues by selecting units with defrost or proper placement.
- Plan electrical and drainage routing with GFCI protection and P-traps.
Introduction
Excess moisture in a crawlspace will damage wood, insulation, and HVAC ducts if left unchecked. A poorly placed dehumidifier can trap humidity and waste energy instead of solving the problem. Homeowners often notice musty odors, seasonal mold spots, and fluctuating indoor humidity levels. These signs mean the crawlspace needs a practical moisture control plan focused on placement, drainage, and controls.
Proper placement matters because air flow and distance to walls affect performance and service access. Drainage determines whether condensate leaves the space or pools under the vapor barrier. Controls decide when the unit runs and how it reacts to changing humidity and temperature. Without attention to all three parts a dehumidifier can underperform or fail sooner than expected.
Professionals diagnose crawlspace moisture by noting odors, visible mold, and wet insulation during an inspection. They also use a moisture meter and check the vapor barrier, sump pump, and condensate lines for signs of trouble. Observing airflow and measuring relative humidity at different locations helps confirm whether placement will be effective. These checks point to the adjustments needed for a reliable install.
Homes in Haslet, TX and North Richland Hills, TX can experience crawlspace moisture that affects indoor comfort and air quality. Addressing placement, drainage, and control setup reduces mold risk and protects structural elements. If you see standing water or persistent damp smells a professional evaluation is the safest next step. A trained technician can confirm problems and recommend durable, code-friendly solutions.

How Crawlspace Dehumidifier Install Works And Why It Matters
A crawlspace dehumidifier install is the process of placing a dehumidifier, routing its condensate, and setting controls for steady humidity control. A correct install moves moist air through the unit and sends condensate safely away from the crawlspace. Homeowners often ask whether a dehumidifier alone will fix musty smells, and the short answer is that proper placement, drainage, and controls are all required. A professional can confirm whether the unit will reach target relative humidity throughout the space before leaving the job.
- Measure crawlspace volume and access points.
- Check vapor barrier condition and seams.
- Select a condensate route or pump location.
- Place the unit for service access and airflow.
Placement matters because dehumidifiers work best when they draw air from the entire crawlspace, not just one corner. Technicians often locate the unit near the centerline or along a clear service run so the blower can circulate air efficiently. They will also leave clearance for filter changes and access to the electrical junction box or GFCI protection. In some tight crawlspaces, installers position the unit to protect ducts and insulation while keeping serviceable space.
Drainage choices determine whether condensate leaves by gravity or requires a condensate pump and discharge line. A professional will inspect for an existing sump or floor drain and test slope and pipe capacity before connecting the dehumidifier. They also check P-trap installation and install a check valve if the line ties into a pump discharge to prevent backflow. If no safe drain exists, a pump with a reliable discharge route is a common solution.
Controls and sensors set how the unit responds to changing conditions and help save energy while keeping humidity steady. Installers often wire a humidistat or integrated control to the dehumidifier and locate the sensor away from the unit’s direct airflow to avoid false readings. For homes in Haslet, TX or North Richland Hills, TX this setup helps avoid seasonal swings that can lead to mold or insulation damage.
Common Crawlspace Moisture Sources And Why They Happen
Groundwater and surface water intrusion often raise crawlspace humidity when exterior grading or gutters allow runoff near foundation walls. Condensation from warm, moist air contacting cool dirt or concrete also adds measurable moisture to the space. A professional inspects footing-to-sill clearances and looks for wet spots along walls and the vapor barrier to confirm these sources. They may use a moisture meter and visual checks to map active wet areas and likely entry points.
Plumbing leaks under the house produce steady moisture that hides behind insulation and within joist cavities, creating musty odors and mold growth. Technicians trace damp insulation, wet staining, and the timing of wetness after faucet or laundry use to locate leaks. They might run a dye test or use an infrared camera to see cooler wet spots that suggest concealed leaks. Identifying leak locations helps determine whether the dehumidifier will be enough or if repairs are required first.
Air leakage from the conditioned house pushes humid air into crawlspaces through rim joists, gaps, and duct boots, raising relative humidity overnight and in summer. Inspectors check for open penetrations, torn duct insulation, and unsealed rim joists to diagnose this problem. Simple tests include holding a smoke pencil or feeling for drafts at suspected gaps while the HVAC runs. Sealing these paths improves dehumidifier efficiency and prevents the unit from running continuously.
Incomplete or damaged vapor barriers allow soil moisture to evaporate into the crawlspace air and collect as humidity near the floor. Homeowners often see damp spots on plastic, loose seams, or wrinkled barrier edges where moisture escapes. A pro measures humidity at several heights and checks barrier overlap, taped seams, and anchoring to confirm vapor barrier failures. Repairing or replacing the barrier is a common prerequisite to a successful crawlspace dehumidifier install.
Warning Signs Of Crawlspace Humidity Damage To Check
Look for wood discoloration, cupped floorboards, or soft joists that suggest long-term moisture exposure and possible rot. A professional will probe suspicious wood with a small awl and record moisture meter readings at multiple points. They will also check insulation for sagging or dark staining that indicates recurring dampness behind the material. These observations guide whether a dehumidifier alone will stop further damage or if repairs are needed first.
Visible mold colonies or repeated mold spots near foundation walls point to persistent high humidity rather than a one-time spill. Technicians inspect patterns of growth and take humidity readings at different heights to confirm whether air stratification or poor circulation causes concentration. They may also examine duct boots and returns for mold, which indicates moist air from the crawlspace reaching the living areas. If mold appears, a controlled remediation plan plus improved moisture control is often required.
Persistent musty smells that return after cleaning often mean hidden moisture pockets under the vapor barrier or behind insulation panels. A pro will run a simple diagnostic by measuring relative humidity and using an infrared camera to spot cool, damp areas that smell musty. They also follow the timing of odors, noting whether they intensify after rain or HVAC use to narrow the source. In Haslet, TX homes, seasonal humidity often reveals these hidden problem spots more clearly.
Standing water, pooled condensate, or a frequently running sump pump indicate drainage failures that undermine any dehumidifier install. Installers inspect slope, check the outlet of condensate lines, and test check valves and P-traps to confirm proper drainage paths. For properties with ongoing moisture affecting indoor air quality and structure, consider the comprehensive approaches described in the moisture control for healthy homes resource. In North Richland Hills, TX properties, these drainage checks often decide if a pump or gravity discharge is necessary.
Choosing The Right Dehumidifier Size And Capacity
Selecting the right capacity starts with measuring crawlspace volume and peak moisture loads to ensure the unit can reach target humidity. Technicians compare manufacturer-rated pints per day to the space cubic feet and expected wet-hours. They also consider air changes per hour when ducts run through the crawlspace and when house pressure forces moist air into the space. A correct match prevents short cycling and reduces wear on the compressor and fan.
- Measure length, width, and height to calculate volume.
- Note visible wet areas and timing after rain events.
- Record current relative humidity at multiple points.
- Check for ductwork that moves moist air through the space.
Dehumidifier selection must factor in temperature range because performance drops at low crawlspace temperatures. Many crawlspace units list capacity at specific temperatures, and professionals verify dew point and coil freeze risk before final selection. If the crawlspace runs cool, installers may choose units with automatic defrost or place the unit where warmer airflow keeps the coil above freezing. This choice helps the unit maintain rated capacity during cooler nights or seasons.
Electrical supply and service access influence which model works best for your layout and maintenance needs. Installers confirm a dedicated circuit, GFCI protection, and clearance for filter changes and control access during a site visit. They also check for nearby condensate drains or a sump pump location where the dehumidifier can tie in without long discharge lines. In Haslet, TX homes, easy access to power and drains speeds a reliable install and reduces temporary workarounds.
A professional confirms sizing with diagnostic checks such as multiple humidity readings, a moisture meter on framing, and airflow observations across the vapor barrier. For example, a homeowner reports musty odors after heavy rain, a tech measures RH in three zones, notes wet insulation, and tests condensate slope to decide on unit capacity. The test results and photos become part of the written recommendation for the proper unit and placement. When sizing is uncertain, a slightly larger capacity unit with control adjustments often offers better long-term control without running continuously.
Finally, controls and sensor placement affect effective capacity because inaccurate sensing can force unnecessary runtime. Installers locate humidistats away from the unit’s direct airflow and near representative zones to avoid false readings. They may recommend a control that cycles based on space RH rather than on the dehumidifier housing alone for even moisture control. In North Richland Hills, TX properties, balanced sensor placement helps prevent over-dehumidification and maintains comfortable indoor conditions.
Best Placement Practices For A Lasting Install
Position the unit where it can draw air from the largest open area without blocking access to plumbing or electrical connections. Leave at least the manufacturer-recommended clearance around the fan and filter for service and coil access. Place the dehumidifier on a level, stable platform to protect it from ground dampness and allow condensate piping to slope properly. If the crawlspace has ductwork running through the center, avoid placing the unit directly under registers to prevent short-circuiting airflow.
Locate the humidistat sensor away from the unit’s direct exhaust to avoid false low-humidity readings and short cycling. Mount the sensor near representative air, not at the floor or inside wall cavities, so it reads typical space conditions. Consider routing a remote sensor wire through a conduit to a mid-span location for more accurate control. In tighter crawlspaces where access is limited, choose a sensor mounting point that a technician can reach for future calibration or replacement.
Plan condensate routing so gravity discharge is first choice, minimizing reliance on pumps that can fail without warning. When a pump is necessary, place it where the dehumidifier condensate line enters the pump to reduce hose length and leak points. Install a P-trap and check valve when tying into an existing sump or pump discharge to prevent backflow and sewer gas. For information about protecting HVAC equipment from drains and leaks, review the recommended practices for preventing HVAC water damage.
Keep the unit away from insulation that could block airflow or be damaged by warm discharge air, and protect surrounding vapor barrier seams from foot traffic. Run electrical on a dedicated circuit with GFCI protection and mount junction boxes above likely water levels for safety. During placement, test airflow by measuring relative humidity at multiple nearby points to verify the unit will affect the whole area. Homeowners in Haslet, TX and North Richland Hills, TX should plan placement with future inspections and routine service access in mind.
Drainage Options And Condensate Management Solutions
A clear condensate route prevents puddles and protects the vapor barrier from damage. Plan for gravity drainage first by checking for existing floor drains or a nearby sump. If gravity is impossible, select a condensate pump sized for your dehumidifier’s flow and head height. Install a P-trap at the dehumidifier outlet to keep odors and sewer gas out of the crawlspace.
Use rigid or flexible piping rated for condensate and slope the line at least 1/8 inch per foot toward the discharge. Secure joints and support the line to avoid sagging that traps water and clogs the route. When tying into a sump pump discharge, add a backflow prevention device and test by running water through the line. Periodic visual checks help catch sags and loose fittings before leaks form.
Protect condensate lines from freezing by routing them through conditioned areas or adding heat tape where permitted. Insulate exposed piping to limit condensation that drips onto the vapor barrier or insulation. Install an accessible cleanout or service tee at low spots to allow clearing of blockages and to assist with routine maintenance. For guidance on preventing blockages, consult the resource about how to prevent clogged condensate drains.
Consider condensate sensing and drain alarms to catch failures before water pools around joists or insulation. Sensors mounted near the dehumidifier base or at sump tops trigger an alert if water appears where it should not. A professional will test the pump operation, check P-trap depth, and run a dye test if needed to confirm a reliable discharge path. Homeowners in Haslet, TX and North Richland Hills, TX find these safeguards reduce surprises and limit moisture damage risk.
Control Setup Monitoring And When To Adjust Settings
Set the dehumidifier control to a target relative humidity that matches your goals and construction materials, usually between forty and sixty percent. Use the factory humidistat for basic control, but consider a remote sensor for more accurate space readings. Check that the control wiring is secure and the sensor sits away from direct exhaust to avoid false readings. If the unit has a built-in timer, reserve it for maintenance cycles rather than primary humidity control to prevent missed moisture events.
- Place a remote humidistat in a representative location.
- Verify control wiring is properly insulated and secured.
- Program setback or schedules only when safe.
- Test alarms and float switches monthly.
Monitor performance over the first few weeks by recording relative humidity at multiple points and times each day. Track condensate flow and listen for unusual sounds from the pump or compressor that indicate stress or blockage. A moisture meter reading on framing and insulation helps confirm the dehumidifier lowers moisture where it matters most. Invisible trends such as rising nighttime RH can signal airflow problems or hidden leaks that need attention.
If readings stay above target after placement, adjust airflow by relocating the sensor or altering fan speed when available. Increasing circulation often fixes stratified humidity pockets without changing the unit capacity. When condensate alarms trigger or you detect recurring pooling, inspect the P-trap, check valve, and discharge slope for clogs or failures. For persistent control challenges, a professional can run diagnostic checks using a moisture meter, airflow measurement, and documented readings to recommend changes.
Homeowners should schedule a follow-up inspection after seasonal shifts to ensure settings still match conditions and materials in the crawlspace. Professionals often reassess controls, recalibrate sensors, and review pump operation during these visits to avoid future failures. Properties in Haslet, TX benefit from this seasonal check because humidity patterns can change with weather. In North Richland Hills, TX a technician may also test humidistat placement against living-space returns to avoid unintended interactions.
When To Call A Professional For Crawlspace Dehumidifier Install
If your dehumidifier runs constantly despite proper controls and placement, a professional should evaluate the system and the crawlspace envelope. A technician will perform diagnostic checks such as multiple humidity readings, moisture meter scans on framing, and airflow observations to confirm persistent load sources. They will also inspect electrical connections including GFCI protection and verify the humidistat or remote sensor calibration. For homeowners in Haslet, TX, this step prevents wasting energy on an unresolved moisture problem.
Call a pro when you notice condensate pooling, repeated pump cycling, or an alarm that does not clear after basic checks. The specialist will test the condensate route, P-trap, and check valve, and run water through the line to locate restrictions or backflow. They may also inspect junction boxes and circuit breakers for nuisance trips that interrupt dehumidifier operation. If the unit shows ice on the coil or freezes frequently, the technician will check defrost controls and ambient temperature conditions.
Contact an expert if mold keeps returning in specific crawlspace areas despite lower measured relative humidity in other zones. A professional will look for hidden moisture sources like plumbing leaks, wall seepage, or air leaks at rim joists that a dehumidifier alone cannot fix. They will document findings with photos, moisture meter readings, and written recommendations so you can prioritize repairs. In North Richland Hills, TX properties, this approach helps separate remediation from routine dehumidification tasks.
Schedule professional help before any complex changes such as tying condensate into a sump, adding a condensate pump, or relocating a humidistat sensor to a new zone. A qualified technician will follow proper routing practices and confirm P-trap depth, slope, and backflow prevention to avoid future failures. They can also coordinate related services like insulation checks and HVAC duct sealing, and reference attic insulation assessments when relevant to overall moisture control. If safety concerns exist or electrical work is needed, a professional ensures the install meets practical safety standards.
Frequently Asked Questions
Where is the best location for a crawlspace dehumidifier install?
Place the unit near the center of moisture sources for even airflow and easy access to the condensate drain. Position it on a raised, level platform above any standing water or insulation to prevent damage. Keep at least 12–24 inches clearance from walls and joists for airflow and service access. If electrical or drainage work is needed, use a licensed professional because crawlspace conditions can pose safety hazards.
How should condensate be routed from a crawlspace dehumidifier?
Route condensate to the nearest approved drain or a sealed sump equipped with a pump to avoid standing water. Use rigid PVC or flexible condensate tubing sized to the dehumidifier’s outlet and slope it downhill for gravity flow when possible. Install a secondary safety drain or float switch to stop overflow and protect wiring and insulation, if unsure, call a professional. Exercise caution around electrical connections and confined spaces and hire a pro for installations involving wiring, pumps, or complex drainage.
What controls and sensors ensure stable crawlspace humidity?
A control strategy should include a humidistat or digital controller that cycles the crawlspace dehumidifier install to hold a target RH level. Remote relative-humidity sensors placed at crawlspace midpoints and near exterior walls prevent false readings caused by localized pockets. A condensate float switch and a routed condensate drain or pump protect against overflow and alert homeowners to drainage failures, but caution: electrical work should be done by a pro. For reliable long-term control, professionals often pair the dehumidifier with a ventilation fan or vapor barrier monitoring and provide written sensor readings and placement notes during inspection.
How do professionals diagnose persistent crawlspace moisture?
A technician begins with a visual inspection for standing water, musty odors, mold, and insulation damage under the floor joists.
They use a moisture meter and hygrometer to map relative humidity and surface moisture at multiple crawlspace locations.
A pro checks sump pump operation, condensate drains, grade, and vapor barrier condition, and they test for plumbing leaks and poor ventilation.
If electrical or structural hazards appear, stop work and call a licensed contractor because safety risks require professional correction.
When is a pump required for crawlspace dehumidifier install?
You need a condensate pump for a crawlspace dehumidifier install when gravity drainage is impossible or uphill. Common reasons include finished floors, blocked crawlspace vents, or high finished-floor elevations. If the pump will discharge indoors or near living areas, install a check valve and routed discharge to an exterior drain. Caution: electrical and condensate plumbing have risks, so hire a licensed professional to size, install, and wire the pump safely.