

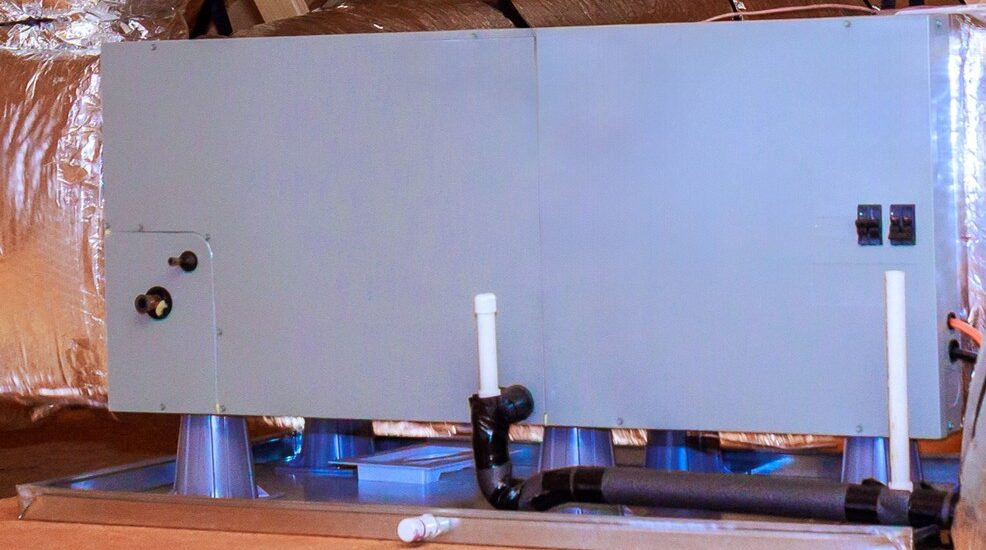
Condensate Float Switch Test Prevents Hidden Leaks
Key Takeaways About Condensate Float Switch Test
A condensate float switch test checks the pan float, wiring, and drain to prevent overflows. This guidance is for homeowners and property managers who see shutdowns or water staining and need timely inspection.
- Identify free float movement and visible pan water levels.
- Prevent nuisance shutdowns by confirming switch electrical continuity.
- Avoid overflow damage by verifying the condensate drain path.
- Spot wiring issues and terminal corrosion near the switch.
- Reduce recurring clogs by testing cleanout flow and trap pitch.
- Plan professional follow up when trips or water damage persist.
Introduction
Condensate float switch test is a quick check that can prevent hidden water leaks and surprise shutdowns in HVAC systems. A failing float switch often causes the condensate pan to overflow or the air handler to stop running mid-cycle. Homeowners notice water stains, a musty smell, or an AC that turns off unexpectedly during hot weather. These symptoms matter because water damage and repeated shutdowns can harm drywall, insulation, and electrical components.
Float switches sit in the condensate drain pan and cut power when water rises above a safe level. Wiring faults or a clogged drain path can make the switch unreliable and cause nuisance trips. Moisture that bypasses the pan can reach the furnace cabinet or nearby ceilings and fixtures. For properties in Colleyville, prolonged damp conditions worsen hidden damage in attics and closets.
Checking the float switch function, the electrical connection, and the drain path protects the system and the home. Professionals use visual inspection, voltage or continuity checks, and trace the drain line for blockages. A correct diagnosis separates a bad switch from a clogged drain or loose wiring. In a common situation, a homeowner reports the AC shutting off while a tech finds a full condensate pan and a tripped float switch during inspection.
Ignoring a bad float switch lets small leaks become mold and structural problems over time. Routine checks reduce unexpected service calls and limit moisture exposure to carpets and framing. If you see frequent shutdowns or water staining, have a qualified technician inspect the switch and drain path. Homes in Azle, TX with older HVAC units especially benefit from a professional evaluation to avoid recurring issues.
How A Condensate Float Switch Works And Fails
A condensate float switch is a small device that monitors condensate pan water level and interrupts power if water rises too high. It uses a buoyant float or magnetic reed switch to open or close a circuit when the pan fills. Many homeowners ask, “Can a float switch cause my AC to turn off suddenly?” Yes, a faulty float switch or wiring fault will interrupt the unit and cause nuisance shutdowns. Professionals treat the switch as a safety device that prevents overflow and water damage to nearby components.
- The float rides on the pan water level.
- An internal magnet or reed completes the circuit at a set height.
- The switch often interrupts the air handler control or a condensate pump.
Float switches fail in a few typical ways that are easy to test visually and electrically. Debris or algal growth can jam the float and stop movement, which homeowners may not see until shutdown. Corroded terminals or damaged wires cause intermittent continuity that mimics a bad switch. A professional will perform a continuity test and inspect insulation to confirm whether the switch or wiring is at fault.
Some float switches also fail because the drain path can’t clear water fast enough, which forces the float to stay tripped. In that case, the switch is doing its job but frequent trips indicate a plugged drain, blocked trap, or poorly pitched line. Homeowners often notice a musty smell or slow drainage before the float trips, which helps narrow the cause. For upgrade options and safer installations, consider condensate safety switch upgrades and code-compliant replacements.
When diagnosing, a technician checks the float travel, measures voltage or continuity, and traces the condensate line for restrictions. They may lift the float manually to confirm the unit restarts, and use a moisture meter near adjacent materials to check for hidden leaks. If wiring shows overheating, the tech documents readings and recommends repair to prevent future nuisance trips. For properties in Colleyville and Azle, TX, those steps help prioritize repairs that protect building materials and indoor air quality.
Common Causes Of Float Switch Malfunction Explained
Mechanical binding often causes a float to stick before electrical failure appears, with mineral crust or sludge restricting vertical travel. A stuck float keeps the circuit continuously open or closed, which can cause unpredictable shutdowns or prevent the safety trip. Technicians look for grit, algae, or rust on the float hinge and test free movement before moving to electrical checks. If movement is hampered, cleaning or replacing the float mechanism restores reliable operation.
Worn or brittle wiring is a frequent cause of intermittent switch behavior and false trips, especially where wires bend near the pan. Exposed or corroded terminals create high-resistance connections that change with vibration, causing the system to cut out under load. A professional inspects terminal integrity, uses a continuity tester or multimeter, and tightens or replaces damaged connectors. Properly secured wiring reduces nuisance shutdowns tied to loose or chafed conductors.
Drain path restrictions force the float to stay in the tripped position when water cannot exit the pan quickly enough, making the switch appear to fail. Common obstructions include algae mats, trapped debris, or an improperly installed trap that holds water. Technicians trace the condensate drain line, remove blockages, and verify gravity pitch so water flows freely away from the pan. When a condensate pump is present, they check pump operation and float interaction to ensure the pump clears the pan before the safety device trips, and homeowners can read more about emergency response options at this emergency float switch.
Faulty mounting and improper float alignment also produce unreliable trips and false positives during normal cooling cycles. If the float sits too high, it may trip prematurely at low condensate volumes, too low and it may not protect against overflow. A technician confirms correct switch placement, measures float travel, and adjusts mounting brackets to factory recommended positions. Correct alignment and secure mounting prevent both nuisance shutdowns and unnoticed overflows.

Warning Signs Of Hidden Leaks And Drain Blockage
Slow drainage often shows before the pan overflows, with water pooling under the air handler or dripping from ceiling seams. You might notice a musty odor near return grilles when water soaks insulation or ductboard. Check for steady dampness or staining along walls and baseboards as these indicate a hidden leak from the condensate path. In Colleyville homes, trapped moisture in attics can accelerate visible decay and mold growth near the unit.
Intermittent shutdowns during long cooling cycles signal the float trips repeatedly as water accumulates faster than it clears. Listen for sudden silence from the blower and then a restart after the system cools; that pattern suggests the safety is cycling. A wet floor in the equipment closet after a run also points to a clogged drain or failed pump not clearing condensate. Inspectors will look for standing water and follow the drain to locate the restriction.
Dripping or steady leaks at fittings along the condensate line often mean a loose trap or failed connection that bypasses the pan. A technician tests for leak paths using a dye or by running water through the drain while observing joints for escape. They also check condensate pump operation and test float interaction as part of pump repair and testing procedures. For units with pumps, a failing motor or stuck pump float commonly produces the same warning signs as a blocked gravity drain.
Visible corrosion, white mineral deposits, or algae in the pan indicate slow flow and recurring clogs that weaken materials over time. Professionals use a moisture meter near framing and take voltage or continuity readings on the switch to confirm whether water caused electrical faults. They may record photos or readings for a written report that shows the leak source and severity. In Azle, TX properties, repeated trips and staining often lead homeowners to schedule a targeted inspection before larger damage occurs.
Step By Step Condensate Float Switch Test Guide
Begin by turning off power to the air handler at the breaker and confirming the unit is dead with a non-contact voltage tester near the control wires. Remove the access panel and visually inspect the float for free vertical movement without forcing it with tools. If the float has a manual test lever, gently lift it to see whether the control circuit would allow a restart when lowered. Photograph the switch and wiring for reference if you need to show a technician later.
- Check float travel visually for smooth movement.
- Look for algae or sludge around the hinge.
- Verify the switch housing is secure.
- Note any loose or corroded terminals.
Next, perform a basic continuity check using a multimeter set to continuity mode while the system remains de-energized and safe to touch. Disconnect the float switch leads at the terminal block before testing to avoid reading through other control components. With the float in the low position the meter should show the expected open or closed state per the switch type during the test. Record whether continuity changes when you lift and lower the float to confirm reliable switching action.
Then inspect the condensate drain route by pouring water slowly into the pan and watching the outlet for steady flow and leaks at joints or traps. Observe the area around the condensate cleanout tee and test flow past that access point to help find blockages downstream. If you find trapped debris or slow outflow, use a wet-dry vacuum at the cleanout or remove the trap for cleaning and reassembly. For guidance on locating and using the cleanout, reference the condensate cleanout tee instructions for proper access and maintenance.
Finally, restore connections and power, then run a short cooling cycle and monitor the pan and switch behavior for several minutes. Note whether the system runs uninterrupted and whether the float remains in its resting position during normal condensate flow. If the switch still trips or wiring shows heat or burn marks, stop and contact a licensed HVAC technician for repair. Homeowners in Colleyville and Azle, TX should keep inspection records and photos to share with a pro when scheduling a service visit.
How To Inspect Wiring And Electrical Connections
Start by cutting power at the breaker and confirming no voltage at the control wires with a tester before touching terminals or splices. Inspect wire insulation for cracks, chafing, or heat discoloration near bends and where wires enter the switch housing. Look for loose screw terminals and backstabbed connections that can create intermittent contact during vibration. If you see melted insulation or burn marks, stop and call a licensed technician because that indicates overheating or a short.
With power off, gently tug each conductor at the terminal to test mechanical security and verify proper ferrules or ring terminals are present. Trace the float switch wiring back to the air handler control board and check for inline splice junctions that may be hidden by insulation. Use a multimeter to perform a continuity test across the switch leads while moving the float to confirm a reliable open and closed transition. Record voltage and continuity readings to share with a technician if repairs are needed.
Inspect the conduit or cable routing for sharp edges and tight bends that can wear wire insulation over time and cause intermittent shorts. Check any nearby condensate areas for corrosion or moisture wicking into junction boxes, as steady dampness accelerates terminal corrosion and connection failure. If the float connects to a condensate pump, verify the pump’s wiring and ground path are secure and free of water exposure. For proper trap pitch and drain orientation details that reduce moisture at fittings, review the evaporator drain trap slope guidance.
After re-securing connections and restoring power, watch for voltage stability and listen for unusual buzzing at terminals during a run cycle, which indicates a loose connection under load. If the switch trips repeatedly despite good wiring, a blocked drain or poor trap design may force trips and require drain cleaning or reconfiguration. Learn routine maintenance steps to prevent buildup and wiring exposure by consulting guidance on how to prevent clogged condensate drains. Homeowners in Colleyville and residents in Azle, TX should document inspection notes and photos to help technicians diagnose recurring electrical or drain-related failures.
Cleaning And Restoring The Drain Path To Prevent Overflows
Start by clearing the condensate outlet and cleanout tee to restore steady gravity flow through the line and prevent the pan from refilling. Use a wet-dry vacuum at the cleanout or the condensate outlet to pull debris and biofilm from the pipe until water flows freely and without gurgling. Inspect the trap and any 90-degree bends for trapped sludge and remove the trap if needed to reach blockages and rinse components. After clearing, run water through the pan while watching the outlet for slow spots and leaks at joints.
For long horizontal runs, check the pipe pitch to confirm a continuous downward slope toward the drain to avoid pockets that collect water and debris. If the existing route holds water or crosses conditioned spaces, consider a reroute to a more direct path or to a floor drain with proper slope and venting. A professional can advise on reroute options and install a new route to code; homeowners can learn more about condensate reroute options at condensate line reroute. Correct routing reduces the chance the float switch will trip from slow drainage.
When a condensate pump serves the line, clean the pump reservoir and test pump operation by pouring water into the pan and observing pump activation and discharge. Remove mineral buildup from the pump float and check valve so the pump clears the pan before the safety switch trips. Inspect the pump outlet for kinks, collapsed tubing, or air leaks that reduce discharge flow and allow the pan to refill. Replace worn tubing and test the pump on several cycles to confirm repeatable operation.
If algae or biofilm recurs quickly, install an accessible cleanout or add a treatment tablet or inline biocide safe for HVAC condensate systems to reduce regrowth. Keep the cleanout point accessible and record its location for future service to speed diagnostics when the float trips again. Monitor the pan and drain during the next several runs to confirm steady flow and that the float remains in its resting position during normal operation. If slow drainage, repeated trips, or leaks persist, contact a licensed technician rather than attempting further electrical or structural changes yourself.
When To Call A Professional After Condensate Float Switch Test
If the float switch still trips after your condensate float switch test and cleaning, arrange professional follow-up without delay. A technician can perform live voltage checks and continuity testing while the system runs to find intermittent faults. They will also inspect the control board and any relay that the switch affects for heat damage or failed contacts. Document your observations and photos to share when scheduling the service call.
- Technician confirms switch operation under load.
- They trace wiring back to the control board.
- They test condensate pump operation on multiple cycles.
- They inspect secondary drain protection and overflow routes.
Call a pro when you find water damage near the air handler, stains on ceilings, or persistent musty odors. An expert uses moisture meters and infrared imaging to check hidden framing and insulation for elevated moisture. If a repeat trip coincides with electrical signs like scorch marks or tripped breakers, stop and request immediate inspection. For homes needing added safeguards, ask about adding a secondary drain pan protection option during the visit.
If your drain clears temporarily but re-clogs within a few weeks, schedule professional evaluation for reroute or trap redesign. Recurring biofilm or algae often requires a permanent fix like accessible cleanouts or inline treatment installed by a technician. In Colleyville and for property managers in Azle, TX, persistent issues justify a written report and recommended repairs to prevent future moisture damage. Keep records of each service for warranty and maintenance tracking.

Preventative Maintenance Tips To Avoid Nuisance Shutdowns
Schedule routine visual checks of the condensate pan and float switch at least twice a year, especially before cooling seasons begin. During a quick visit, verify the float moves freely and that the drain outlet shows steady flow when tested. Include a brief wiring inspection for loose terminals and signs of moisture intrusion without opening control panels. Document findings and set reminders to repeat the check to catch wear before it becomes a failure.
Perform periodic drain-line maintenance to prevent biofilm and slow drainage that can trigger nuisance trips and hidden leaks. Use professional drain-line flushing methods and consider adding accessible cleanouts to speed future service and reduce clogs. Replace brittle or collapsed tubing segments and firm up pipe supports to maintain proper pitch and flow. If the system uses a pump, add a pump-check routine to confirm reliable activation over several cycles.
Keep a simple log of shutdowns, smells, and visible staining so a technician can spot patterns and prioritize repairs on repeat visits. When shutdowns repeat after cleaning, request a live diagnostic to capture intermittent electrical behavior or control board interactions. For properties in Colleyville, include attic or closet access notes so inspectors can reach the unit quickly. If you manage multiple buildings, centralize records to help track recurring drain or float problems across units.
Limit DIY electrical work and call a licensed HVAC technician for wiring repairs or circuit issues that could cause repeated trips or safety hazards. A trained pro uses voltage and continuity checks to confirm root causes and avoids opening control panels without proper precautions. For scheduled upkeep, ask about professional drain-line flushing and routine maintenance packages to reduce nuisance shutdowns long term. Residents in Azle, TX should keep service records handy when arranging preventive maintenance visits.
Frequently Asked Questions
What is a condensate float switch test and why do it?
A condensate float switch test checks that the switch shuts off the system when the drain pan fills, preventing overflow and water damage. Technicians observe the switch operation, verify wiring continuity, and confirm the drain path clears to rule out clogs. Performing this test catches hidden leaks and reduces nuisance shutdowns that leave homes damp or systems offline. If you find electrical issues or persistent drainage problems, stop and call a professional because live circuits and ceiling damage present real safety risks.
How do I tell if the float switch is causing shutdowns?
Frequent or unexplained system shutdowns during cooling that stop when you tilt or lift the drain pan suggest the float switch may be tripping. Check for standing water, slow drainage, or visible debris around the switch because these cause the float to stick and trigger shutdowns. A simple condensate float switch test by a technician includes observing switch continuity and simulating float activation while watching the condensate drain path. If you smell mold, see water damage, or feel unsure, stop the system and call a professional for safe diagnosis and repair.
Can wiring or a clogged drain fail a float switch?
Yes; wiring faults or a clogged condensate drain can make a float switch fail to operate or trip falsely. Loose or corroded wiring can prevent the switch from completing the safety circuit or cause intermittent shutdowns. A blocked drain or slow trap can keep the float stuck or trigger frequent nuisance shutoffs during high humidity. If you suspect electrical or drain problems, shut the system off and call a licensed HVAC technician to diagnose and repair safely.
What steps does a pro take to diagnose a float switch?
A pro begins with a visual inspection of the condensate pan, float switch, and drain line for clogs, corrosion, or standing water. They test the switch with a multimeter for continuity and verify wiring and connections at the control board. Technicians simulate normal condensate rise to confirm the switch triggers the condensate safety circuit and shuts down the unit. If electrical or fall hazards exist, they stop work and recommend a licensed technician for safe repair and verification.
When should I call a technician after a float switch test?
Call a technician after a condensate float switch test if the switch fails to reset or the drain still backs up. If wiring shows intermittent continuity or the float trips without visible clogging, seek professional help. If you smell mold, see persistent moisture, or notice water stains, stop using the system and call a tech because of health and water damage risk. A qualified technician will diagnose wiring, condensate drain, and safety interlocks safely and accurately.