

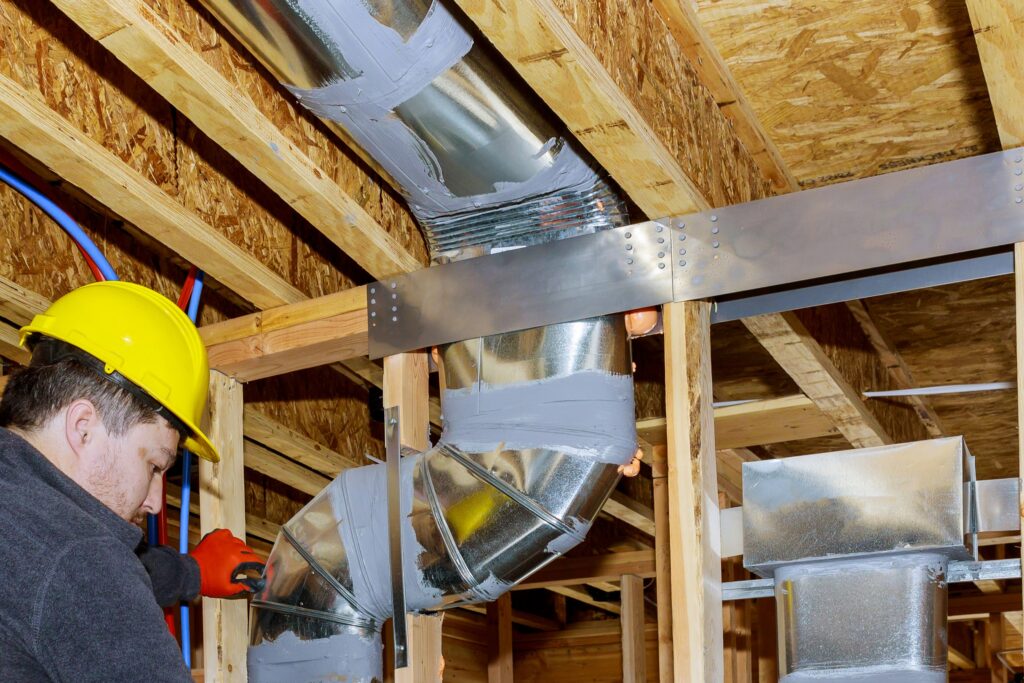
Duct Mastic Sealing for Lasting Leak Repairs
Key Takeaways About Duct Mastic Sealing
Duct mastic sealing is a paste-like compound applied to duct seams and joints to create airtight flexible bonds that resist vibration and temperature changes. This summary is for homeowners and property managers who notice uneven airflow or noise and want durable leak repairs that restore comfort.
- Identify leaks using smoke tests pressure checks and visual inspection.
- Prevent future failure by cleaning surfaces and prepping metal edges.
- Avoid quick fixes like peeling tape that do not last.
- Spot moisture corrosion or pest damage before sealing begins.
- Reduce system strain by restoring balanced register airflow readings.
- Plan for follow up testing documentation and possible mechanical repairs.
Introduction
Leaky ductwork steals cooled or heated air before it reaches living spaces and makes HVAC systems work harder. You might notice rooms that never reach set temperatures or uneven airflow from supply registers. A persistent dust buildup near vents or a subtle whistling sound can also point to leaks. In many homes the real issue is poor seals where ducts join or where the plenum meets the furnace.
Duct mastic sealing offers a long-lasting way to close those gaps and restore proper airflow. Unlike tape that peels, mastic bonds to metal and stays flexible through temperature changes. Technicians combine careful inspection with targeted mastic application to protect seals from vibration and movement. Proper sealing reduces strain on the blower and helps the system maintain comfort levels more consistently.
Finding leaks is not always obvious because many occur inside walls, ceilings, or crawlspaces. Pros use visual checks, pressure testing and airflow observations at supply plenum, return grille, and duct joints to locate problem areas. They also watch for signs like colder duct surfaces in winter or warm spots in summer. For homeowners in Arlington these hidden problems can explain persistent comfort complaints and odd energy use patterns.
After diagnosis, the right mastic application follows material choice, surface prep, and proper curing time under normal airflow conditions. Experienced techs inspect connections at the evaporator coil, supply plenum, and major branch runs before sealing. A clear written report with photos or readings helps confirm what was found and fixed. For properties in Keller, TX, durable duct mastic sealing can make a noticeable difference in home comfort and system performance.
How Duct Mastic Sealing Works Mechanically
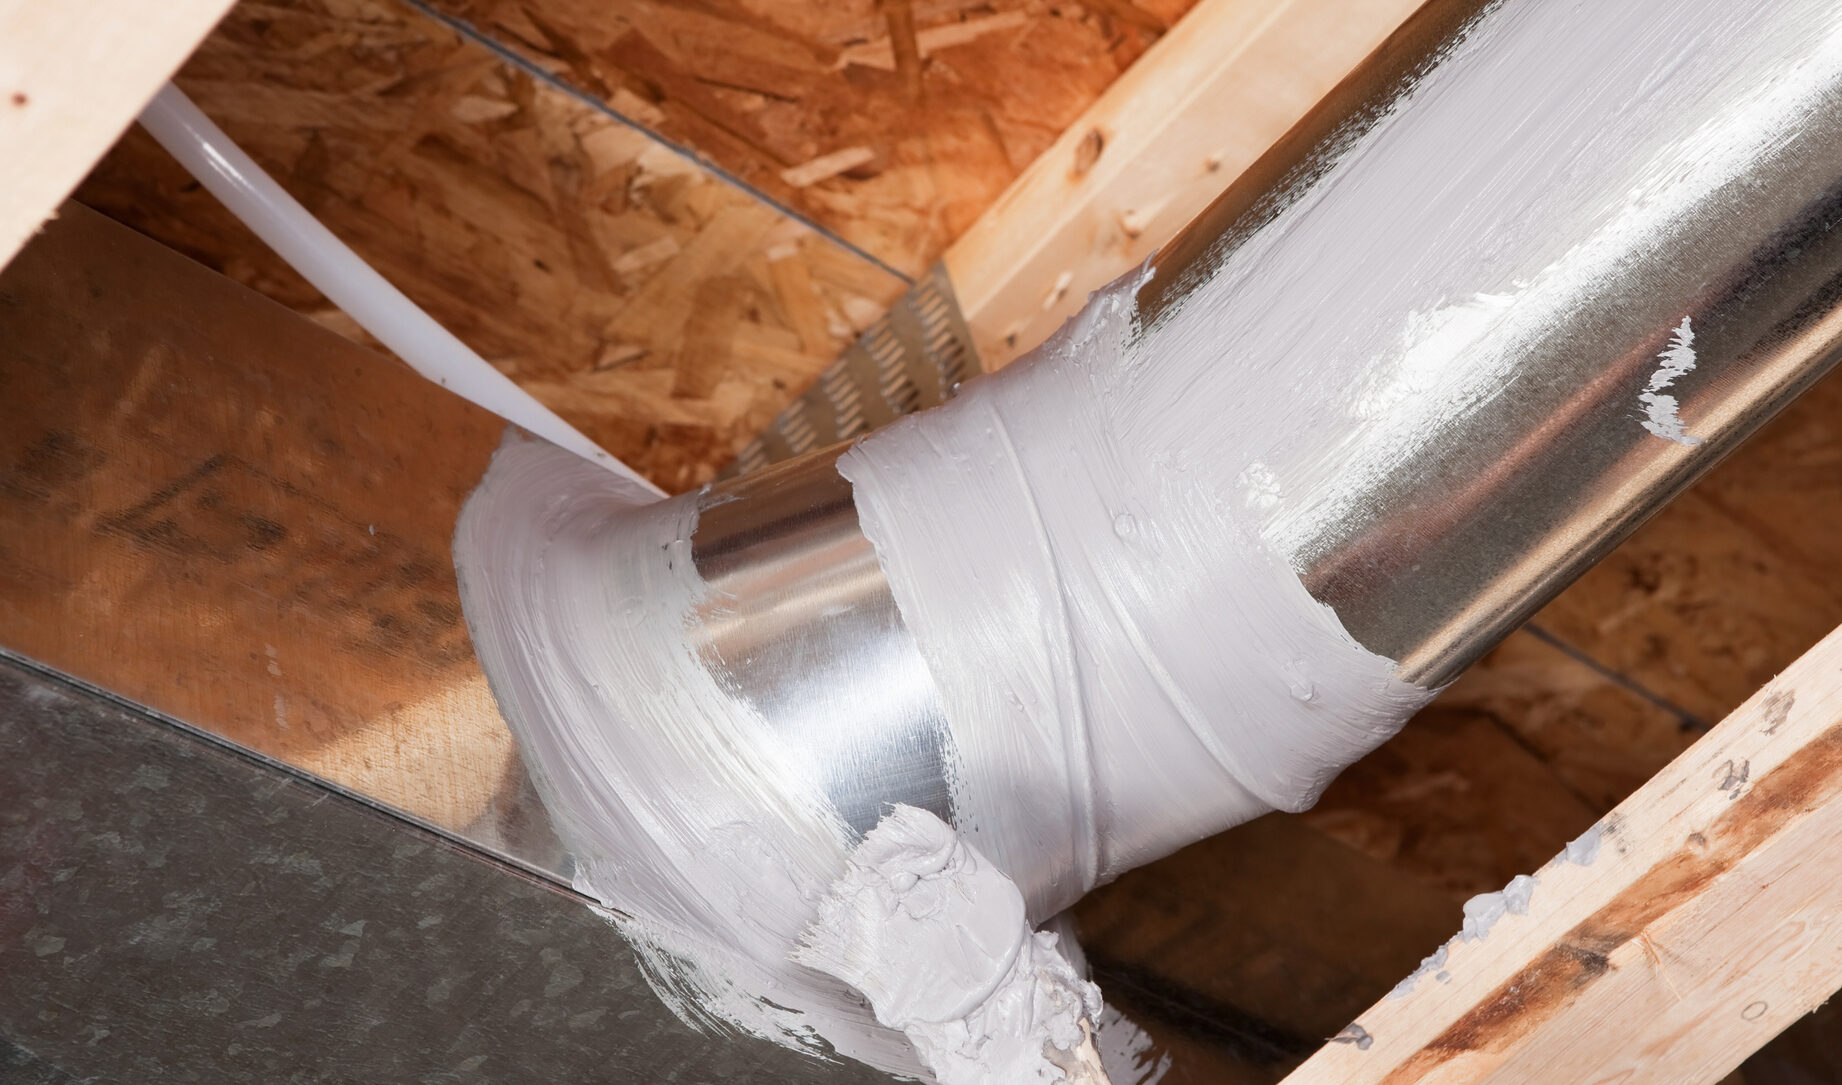
Duct mastic sealing is a paste-like compound applied to duct joints and seams to create an airtight, flexible bond. The compound fills gaps, adheres to metal, and resists vibration without hardening into a brittle layer. Homeowners often ask whether mastic stops the whistling sound at vents, and the short answer is yes when applied to the source of the leak. A professional can show you before-and-after airflow readings to confirm the seal reduced leakage.
- Mastic adheres to sheet metal and flexible duct materials.
- It cures to a flexible seal that moves with the ductwork.
- Mastic resists temperature swings without cracking.
- It blocks airflow paths that cause pressure loss.
Mechanically, mastic works by creating a continuous membrane over joints, seams, and patched holes in the plenum and runs. The membrane changes an air path that used to vent into attics, walls, or crawlspaces into a sealed channel delivering conditioned air. Technicians inspect the supply plenum and return grille areas where pressure differences most clearly reveal missing seals. Confirming success often uses a pressure-based duct test to measure leakage before and after sealing.
Mixing and curing matter because trapped solvents or dirty surfaces reduce adhesion and cause future failure. Pros clean metal edges, remove loose fiber, and apply mastic in a continuous bead or skim coat so no voids remain. For hard-to-reach seams behind insulation, they may use brushes or trowels to press mastic into the joint for full contact. Homeowners in Arlington should note that proper curing time prevents sticky patches that attract dust and degrade performance.
The cured mastic remains flexible, which helps seals survive thermal expansion, vibration from the blower motor, and seasonal settling of duct supports. In branch takeoffs and at the evaporator coil connection, flexible seals reduce stress on duct collars and attachments. A clear written report with photographs or test results documents where technicians applied material and what leakage values improved. For homeowners in Keller, TX, that documentation helps track performance and plan future maintenance.
Common Causes Of Duct Leaks And Failure Modes
Age and mechanical stress commonly cause duct failures when seams loosen or fasteners pull through after years of vibration. Metal fatigue at takeoffs and at the plenum connection can create gaps that grow with every heating and cooling cycle. Rodent or pest damage can tear flexible ducts or chew insulation away, exposing holes that leak air into unconditioned spaces. In attics and crawlspaces, seasonal settling of supports often shifts ducts so joints no longer align correctly.
Poor initial installation causes many leak patterns, including undersized collars, insufficient sealant, or overlapping seams that never received full contact. Sharp edges or burrs on sheet metal can slice flexible connectors or prevent mastic from making full contact, leading to short-lived patches. Missing or loose tape at branch collars allows pressurization to force conditioned air through seams during blower operation. Technicians check collar fit and fastening to confirm whether a repair must include mechanical correction before sealing.
Corrosion and moisture create another common failure mode where metal deteriorates, especially near condensate drains or damp basements. Rust can flake and form jagged gaps that stop adhesives from bonding. In those cases, pros often remove compromised sections or install sleeves to restore a solid surface for mastic to adhere. For homeowners in Arlington, visible rust stains or moisture on duct surfaces should prompt an inspection to prevent larger air loss and indoor humidity problems.
Flexible duct material also fails where it connects to rigid plenum or at high-bend points, causing compression and pinched flow that stresses seams. Excessive airflow velocity from undersized ducts can lift seams and produce ripping at joints over time. Technicians diagnose these issues by inspecting the supply plenum, checking the evaporator coil connection, and using simple airflow observations at registers. For detailed duct sealing work in the area, see duct sealing services in Colleyville which explain typical failure patterns and repair options.
Signs Your Duct System Needs Immediate Attention
Unusual temperature swings between rooms that used to balance can signal hidden duct breaches needing fast attention. You might notice a single register blowing weakly while others remain strong, or a sudden rise in noise when the blower starts. Technicians look for pressure imbalances at the supply plenum and return grille to confirm where conditioned air escapes. A quick diagnostic step is checking duct surfaces for cold or warm spots while the system runs to narrow the problem area.
Persistent dust accumulation around specific vents or streaks of soot near seams often point to leaks that pull attic or wall air into the ducts. Visible dust trails along a flex-duct or at a takeoff suggest air movement through a gap rather than through the diffuser. Pros use simple smoke testing or feel tests near joints to locate the exact leaking seam before making permanent repairs. These observable cues help prioritize mastic sealing where it will restore airflow most effectively.
A new or louder whistling, rattling, or vibrating sound when the system cycles can mean a failing connection at the plenum or duct collar. Sounds that change with blower speed indicate a mechanical separation that increases leakage under load. Technicians will inspect the evaporator coil connection and supply plenum for loose fasteners or split collars to determine whether sealing alone will suffice. If the metal is bent or torn, mechanical repair often precedes durable duct mastic sealing to ensure a lasting bond.
Higher than normal humidity, condensation on duct surfaces, or visible mold near seams require immediate evaluation because moisture reduces adhesion and can hide corrosion. A pro will check condensate drain lines and nearby connections before applying sealant to ensure the area will stay dry. For homeowners in Arlington and inspections in Keller, TX, documenting visible mold or moisture readings helps guide whether sections need replacement first. After addressing moisture sources, targeted mastic sealing can typically restore airtightness and prevent further humidity problems.
Locating Leaks Step By Step For Effective Repairs
Technicians start with a systematic airflow check at the supply plenum and return grille to pinpoint pressure imbalances and likely leak zones. They may use handheld anemometers and visual inspection to compare register airflow against expected values and detect weak branches. A common next step is a smoke or theatrical fog test around seams and collars to reveal escaping air paths clearly. Results from these observations guide targeted access into attics, crawlspaces, or ceiling chases where seams need closer inspection.
- Check pressure at the supply plenum.
- Inspect collar connections and fasteners.
- Use smoke to reveal active leaks.
- Measure airflow at suspect registers.
- Document findings with photos.
Where visible gaps or torn duct boot fabric appear, techs remove insulation carefully to expose the metal seam for full assessment before applying sealant. They often probe joints for loosened screws, missing crimps, or sharp edges that prevent mastic from bonding well. In some cases they perform a duct pressure test to quantify leakage and to prioritize repair areas for an effective seal. These measurements generate a baseline that technicians compare after mastic application to confirm improvement.
For hidden networks, crews may perform a duct pressure mapping process that reveals imbalances across the system and shows which branches leak most under load. Mapping helps locate leaks that only appear at operating blower speeds or during specific temperature conditions in attics and wall cavities. A clear written record of mapping and spot checks supports repair planning and helps homeowners understand where air loss happened. Homeowners in Arlington should ask for these findings when unusual room temperatures persist after other repairs.
Before sealing, professionals clean metal edges and remove dust or residue that would reduce adhesion and cause early failure. They then mark each seam to receive mastic and photograph problem spots for a final report confirming work scope and results. After repairs, simple follow-up checks include measuring register airflow and listening for previously audible whistling that should stop. If problems remain, technicians re-inspect connections and adjust mechanical fasteners before reapplying sealant to ensure a durable finish for homeowners in Keller, TX.
Applying Duct Mastic Sealing For Durable Results
Technicians begin by preparing the repair area, removing insulation and cleaning metal surfaces so mastic bonds fully to the ductwork. They roughen smooth sheet metal edges with a scraper or brush to improve adhesion and remove dust or oily residues. For flexible ducts they inspect the inner liner and trim ragged edges to create a solid contact surface before applying mastic. Proper surface prep prevents future peeling and helps the compound form a continuous membrane over seams.
Application often uses a trowel or wide brush to force mastic into the seam, ensuring no voids remain where air can bypass the seal. Technicians apply an initial heavy bead and then smooth a thin skim coat over adjacent metal so the seal blends with the duct surface. At takeoffs and collars they work the material around the entire circumference to keep the bond flexible under vibration. They avoid simply coating the outside because pressure can push mastic away if it is not worked fully into gaps.
When sealing near the evaporator coil or plenum, crews coordinate with system controls to run the blower at typical speed so pressure loads reproduce operating conditions. A follow-up airflow test helps confirm the repair reduced leakage and restored balance, results often get recorded alongside photos for the report. If a visible gap remains after curing, the technician adds a second pass of mastic or reinforces the joint with mechanical fasteners before resealing. For documented performance verification, homeowners can request an airflow performance test in Colleyville.
Pros allow adequate curing time and advise against re-insulating too soon because trapped moisture or adhesives can weaken the bond. They also check nearby condensate drains and vapor barriers to prevent moisture exposure that undermines long-term adhesion. Technicians record which branches received sealing and include photos and measurements so homeowners can track improvements. For routine upkeep and guidance on preserving sealed ducts, see information about how to maintain duct integrity in the HVAC system at maintain HVAC duct integrity.
Materials Tools And Prep For Long Lasting Seals
Before applying duct mastic sealing, technicians gather specific materials like sheet-metal brushes, solvent wipes, and a quality mastic rated for HVAC use. They also bring trowels and wide-bristled brushes to force compound into seams and around collars for full contact. Protective gloves and eye protection reduce skin contact with sticky compounds and dust during prep steps. For work in tight attic spaces, techs carry headlamps and knee pads to keep steady application and avoid gaps from awkward angles.
Surface prep often includes removing loose insulation and trimming ragged flex-duct liners to expose clean edges that mastic can bond to reliably. Pros use a scraper or wire brush to remove rust flakes and mill-scale that block adhesion and then wipe surfaces with appropriate cleaners. If nearby condensate or moisture exists, they identify and address that source before sealing to avoid future bond failure. Homeowners in Arlington should expect technicians to verify dryness with a visual check before proceeding.
Tools for verification matter as much as application tools, techs commonly use smoke pencils or theatrical fog to confirm leaks after curing and measure register airflow to ensure balance. They may also adjust dampers and re-run airflow checks to confirm the sealed runs deliver expected volumes, linking sealing work to broader airflow tuning practices. For coordinated work on system balance after sealing, technicians often reference airflow damper tuning procedures to stabilize flows. Documented readings and photos provide homeowners a record of the before-and-after condition and the steps taken.
Finally, proper staging includes protecting surrounding insulation and finishes with drop cloths and avoiding over-application that creates sagging or drips during cure. Technicians follow manufacturer cure times and advise against re-insulating until the mastic fully sets to ensure adhesion longevity. For more complex systems or if the evaporator coil area needs access, professionals confirm clearances and mechanical fasteners before sealant application. After work, they inspect for any missed gaps and make touch-up passes to complete durable duct mastic sealing.
When To Call A Professional For Duct Mastic Sealing
If you notice persistent uneven airflow after a basic seal, call a professional so they can evaluate system-wide causes. A trained tech will perform diagnostic checks like pressure testing and register airflow measurement under operating conditions. They will inspect the evaporator coil connection and supply plenum for damage that can prevent durable adhesion of mastic. Homeowners in Arlington should prioritize an expert review when symptoms persist despite visible patching attempts.
- When whistling returns under load.
- When moisture or mold appears near seams.
- When rust prevents a clean bonding surface.
- When leaks occur in hard-to-access cavities.
- When system balance still feels off after repair.
A professional diagnosis usually includes a smoke test and targeted pressure measurements to confirm leak locations definitively. Technicians may also record before-and-after register airflow to quantify improvement and create a repair record. If the duct metal is damaged, a pro can replace sections or add mechanical fasteners before applying mastic for a lasting seal. For attic-specific returns that draw dust, a technician can perform focused corrections and reference attic return strategies like attic return sealing and dust control.
Call for professional help when sealing risks include active moisture, visible corrosion, or pest damage that undermines adhesion longevity. Experts use proper surface prep, curing protocols, and follow-up airflow checks to avoid repeat failures and hidden bypasses. If access requires attic or crawlspace entry, technicians will take safety steps and verify clearances before work begins. For ongoing or complex balance issues, schedule a full system airflow performance test so results guide any further adjustments in Keller, TX.

Prevention Maintenance Tips To Keep Ducts Sealed
Schedule regular visual checks of accessible duct runs to catch small gaps before they grow into larger leaks that affect comfort. Inspect common stress points like takeoffs, collars, and plenum seams for any new separation or loose fasteners. When you find dust streaks or felt vibration, mark the spot and plan sealing during the next maintenance visit. For attic areas, consider pairing sealing with insulation upgrades to stabilize temperatures around ducts.
Keep mechanical connections tight by checking and retightening screws, crimps, and clamp bands on flexible ducts and sheet-metal collars. If fasteners pull through or metal deforms, replace or reinforce that section before applying mastic to ensure a lasting bond. A quick pressure or airflow check after tightening reveals whether the mechanical fix reduced leakage enough to avoid immediate sealing. Homeowners in Arlington should note that settling or attic movement can loosen fasteners over time needing periodic attention.
Protect sealed seams from moisture and dust so mastic retains adhesion and flexibility over many seasons. Avoid re-insulating too soon after sealing, allow manufacturer cure time and confirm dryness at condensate drains and nearby vapor barriers. Where ducts run through damp spaces, inspect for signs of corrosion and address moisture sources before resealing to prevent repeat failures. For guidance on pairing sealing with proper insulation, review recommendations for insulating HVAC ductwork to reduce condensation risk.
Include simple performance checks in routine HVAC maintenance to confirm seals remain effective under load and to catch new leaks early. Measure register airflow and listen for whistling during startup and steady-state operation as practical diagnostics you can do while a tech is present. If balance shifts or a previously quiet register becomes weak, schedule a targeted inspection before problems spread to other branches. For properties in Keller, TX, periodic checks support consistent comfort and reduce chances of hidden energy losses.
Frequently Asked Questions
How does duct mastic sealing stop whistling vents?
Whistling vents often mean air leaks or gaps in the supply plenum or at duct joints that create high-velocity flow and vibration. Duct mastic sealing fills gaps and smooths transitions, reducing turbulence that causes whistling noises. A technician will inspect supply plenums, take pressure or smoke-test readings, and apply mastic where leaks produce audible tones. If you suspect large leaks or access to main ducts is limited, caution is advised and you should hire a professional to avoid damage or safety risks.
What signs show ducts need mastic sealing now?
Look for uneven room temperatures and weak airflow at supply registers while the system runs, which often signal duct leaks. Check for dust buildup or visible gaps around seams, take note of thin insulation or disconnected ducts in attics or crawlspaces. Listen for whistling or rattling noises near the plenum and feel for cold or warm air escaping along duct joints to confirm a problem. If you suspect large leaks or see mold, avoid DIY sealing, contact a professional for safe inspection and Duct mastic sealing.
How do pros locate hidden duct leaks before sealing?
Technicians begin with a visual inspection of the supply plenum, trunk lines, and register boots for obvious gaps or loose connections.
They use a smoke pencil or theatrical smoke to reveal airflow at seams and around access panels.
A duct blaster or differential pressure test helps quantify leakage and pinpoints zones needing repair before Duct mastic sealing.
Working near insulation or combustion appliances can be hazardous, so hire a professional to test and seal ducts safely.
How long does duct mastic sealing take to cure?
Curing time for duct mastic sealing depends on compound thickness, temperature, and ventilation in the duct.
Thin coats typically skin over within 1 to 2 hours at room temperature.
Full cure often takes 24 to 48 hours for common water-based mastics, longer in cool or humid conditions.
If you suspect fumes or poor ventilation, stop work and call a professional for inspection and safe handling advice.
When must damaged duct sections be replaced first?
Replace duct sections when metal is crushed, corroded through, or when large holes prevent effective sealing with mastic. Technicians also replace sections with detached seams or missing connectors that cause persistent leaks. If mold, rodent damage, or standing moisture exists, stop work and call a professional because of health and safety risks. A qualified HVAC pro will inspect the duct, confirm damage, and recommend replacement before proceeding with Duct mastic sealing.