
Heat Exchanger Inspection for Safer Gas Heat
Key Takeaways About Heat Exchanger Inspection
A heat exchanger inspection checks the furnace component that keeps combustion gases separate from indoor air and looks for cracks, corrosion, and venting problems. This guide is for homeowners and property managers who need safety checks before or during the heating season.
- Identify hairline cracks rust and visible deformation on exchanger surfaces.
- Prevent carbon monoxide entry by confirming proper combustion and draft.
- Avoid continued furnace use when tests show elevated combustion gases.
- Spot soot staining uneven flames and unusual noises near the cabinet.
- Reduce long term damage by addressing venting airflow and mounting issues.
- Plan repairs monitoring or replacement based on documented test results.
Introduction
A heat exchanger inspection checks the metal component that separates combustion gases from the air blown through a gas furnace. Cracks or corrosion in the exchanger can let carbon monoxide mix with home air, creating a serious hazard. Homeowners often notice odd smells, yellow burner flames, or unexplained headaches when a problem is developing. Knowing what an inspection looks for helps protect the people inside your house.
Technicians search for hairline cracks, warping, and corrosion on the heat exchanger surface using visual checks and simple tools. They also inspect the burner, flame pattern, and combustion chamber for signs that stress affected the exchanger. Airflow issues at the blower and clogged condensate paths can worsen exchanger problems over time. Early detection reduces the chance of harmful gases entering living spaces.
A proper inspection includes checks of the flue and venting path to confirm combustion gases leave the home as designed. Inspectors often run the furnace and observe the burner, watch for abnormal noises, and note any soot or staining near joints. Measuring device readings and photos are recorded to document condition and support recommendations. These steps focus on occupant safety rather than equipment sales.
Homeowners in Colleyville, TX and Fort Worth, TX understand how important safe heating becomes during colder months. If you smell exhaust, feel lightheaded, or see black staining near the furnace, those are clear signals to contact a professional. A written report, photos, and suggested next steps give you evidence to act on the findings. Quick professional attention can keep your household safe and your furnace operating as intended.
What A Heat Exchanger Inspection Covers
A heat exchanger inspection examines the furnace component that keeps combustion gases separate from the indoor air. During the inspection, a technician looks for hairline cracks, corrosion, warping, and loose seams that could allow combustion byproducts into living spaces. Homeowners often ask whether the inspection can detect carbon monoxide risks, and a proper check will reveal conditions that raise that risk. The inspector documents visible damage with photos and notes to support safety recommendations.
- Visual inspection of heat exchanger surfaces
- Observation of burner flame pattern
- Check of combustion chamber and vent joints
- Airflow and blower condition review
- Recordings of readings and photos
Inspectors also run the furnace several minutes to observe operating behavior under typical load. They watch for unusual sounds, uneven burner flames, and soot buildup near seams and vent connections. A common homeowner question asks what tools are used during inspection; technicians typically use a flashlight, mirror, and camera for visual checks. If further confirmation is needed, the inspector may recommend follow-up testing or more invasive inspection methods.
Another key area covered is the flue and venting path to ensure combustion gases exit the home properly. The technician checks for blockages, loose connections, and signs of backdrafting near vent terminations. For properties in Fort Worth, TX, seasonally heavy operation can make these vent checks especially important before winter. The written inspection report lists findings and suggested next steps that focus on occupant safety.
Technicians will inspect related components like the burner, blower motor, and condensate paths that influence heat exchanger stress. They may record combustion readings or photos as evidence for repair decisions and homeowner records. In a common situation, a homeowner smelling exhaust will prompt the technician to check flame color and vent operation first. For Colleyville, TX residents, a documented inspection helps decide whether repair, further testing, or replacement is the safest action.

How Heat Exchanger Cracks Develop And Why It Happens
Metal fatigue starts when repeated heating and cooling cycles stress the heat exchanger material until tiny cracks form. Corrosion from moisture or acidic combustion byproducts eats away metal and widens those initial fissures over time. Poor combustion that produces soot or uneven flames concentrates heat in spots and raises the risk of localized warping. Technicians look for these patterns because they show how small defects grow into larger, dangerous openings.
Blockages or restricted venting change pressure and temperature inside the combustion chamber, which speeds crack propagation in seams and bends. A partially obstructed flue can cause hotter exhaust to linger against exchanger walls and create thermal stress. Inspectors may trace such issues back to vent paths and terminations during their assessment, including a focused flue inspection. Recognizing vent-related causes helps target repairs that stop further damage.
Mechanical impacts and poor installation also contribute when unusual bending or stress concentrates at welded joints and bolt holes. Vibration from an imbalanced blower or loose mounting can fatigue metal over months or years. Technicians check mounting points, seams, and welds because failures often start where the exchanger connects to the furnace cabinet. Finding those weak spots early limits the chance that combustion gases will cross into the air stream.
Manufacturing defects and age matter as well; older exchangers might contain thin areas or original weld flaws that reveal themselves under load. In a common situation, homeowners spot intermittent exhaust smells and a machine that cycles unevenly, and a professional then inspects flame pattern and exchanger seams. For properties in Fort Worth, TX regular seasonal use can expose marginal exchangers faster than occasional use. Identifying the root cause guides the recommendation to repair, monitor, or replace for occupant safety.
Common Causes Of Heat Exchanger Damage In Homes
High heat and soot buildup often concentrate at bends and joints, causing localized thinning of the metal that leads to leaks. Poor combustion can accelerate soot formation and focus heat where metal is weakest, producing tiny fissures that grow over time. A technician will note visible warping or pitting during an inspection as indicators of this damage mechanism. In Colleyville, TX homes, seasonal heavy use can make localized wear show up sooner on marginal exchangers.
Moisture and condensate can cause chemical corrosion on internal surfaces, especially where flue gases cool and condense. Corrosion tends to attack seams and welds first, making those areas common starting points for failures that allow gases to cross into the airstream. Technicians check for rust, flake patterns, and deteriorated seams during a visual inspection to identify this cause. Addressing drain and condensate routing stops further metal loss once discovered.
Physical stress from improper mounting or excessive vibration damages support points and can open welds or create stress cracks over time. An imbalanced blower or loose mounting hardware transmits repeated shock to the exchanger, and technicians will inspect mounting bolts and cabinet fit. Detecting mechanical issues helps prevent small defects from becoming leaks that threaten occupant safety. For Fort Worth, TX properties, older mounting hardware sometimes needs attention during routine checks.
Obstructed venting and backpressure change internal temperatures and force exhaust to linger against exchanger walls, which speeds metal fatigue. Technicians often perform a combustion analysis to confirm whether venting or combustion problems contribute to exchanger stress and to measure combustion efficiency. They also look for soot patterns and uneven heat distribution that point toward vent or burner issues. Fixing vent paths and correcting combustion prevents recurring damage once the exchanger condition is addressed.
Warning Signs To Watch For In Gas Heating Systems
Watch for unusual odors that resemble vehicle exhaust or stale fumes, as these often indicate combustion leakage into the air stream. Listen for new rattles, popping, or uneven cycling that may mean the heat exchanger is under stress or the burner is unstable. Pay attention to persistent soot or dark staining near the furnace or vent connections, because that suggests combustion products are escaping. Notice any sudden increases in condensation or moisture near the furnace, since that can speed corrosion on metal surfaces.
- Yellow or flickering burner flame
- Exhaust-like odors inside living spaces
- Black soot or staining near vents
- Unusual furnace noises during operation
- Higher-than-normal humidity around the unit
If occupants report headaches, dizziness, or nausea when the furnace runs, treat those reports seriously and seek professional help. Technicians confirm such concerns with a visual inspection and combustion checks before recommending next steps. They may use an infrared camera, a combustion analyzer, and photos to document findings and locate leaks. For homeowners in Colleyville, TX, quick action on these symptoms reduces exposure risks and provides clear evidence for repair decisions.
Also watch for changes in heating performance like uneven rooms or more frequent cycling that stress the system over time. A pro will inspect the heat exchanger, burner, intake and flue connections, and the blower assembly to diagnose causes. They look for signs of backdrafting at the vent termination and may reseal a failing flue joint or recommend a flue pipe reseal if the vent path leaks. If occupants feel lightheaded or suspect carbon monoxide, contact a professional immediately and use a CO detector per manufacturer instructions.
What Technicians Check During Heat Exchanger Inspection
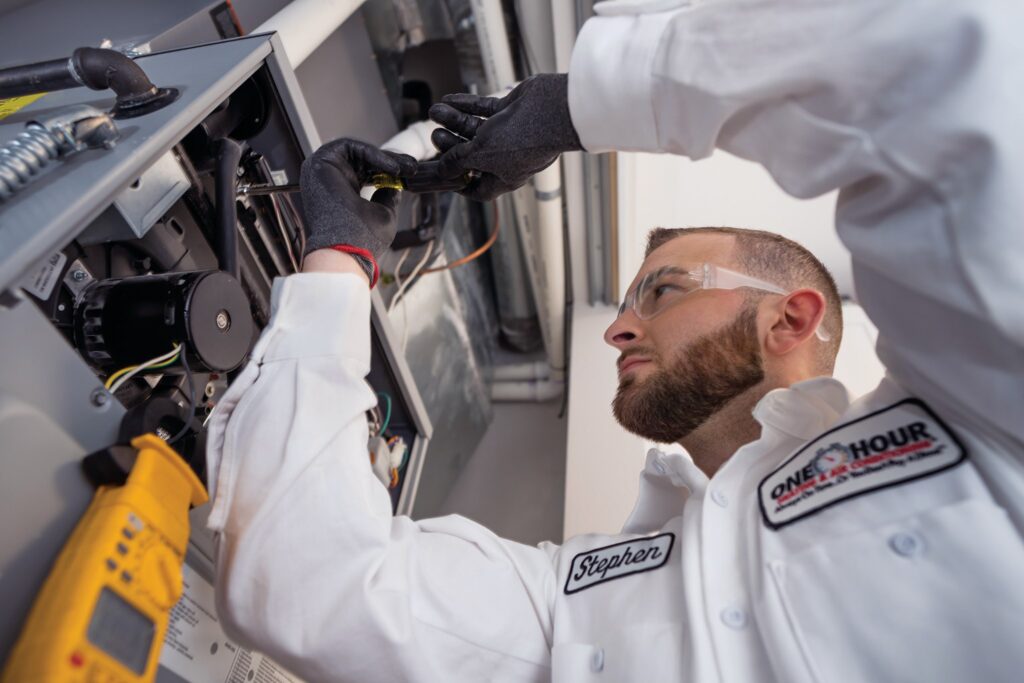
Technicians begin with a close visual sweep of the exchanger surface, looking at seams, welds, and access panel joins for small defects. They use a bright flashlight and a mirror to view hidden bends and record any suspect areas with photos. Next they inspect burner operation and flame color to see whether combustion stresses could have caused accelerated metal fatigue. Observing these components together helps determine whether visible damage likely connects to combustion irregularities.
Inspectors then run simple diagnostic checks while the furnace operates, watching for soot deposits, unusual vibration, and odd sounds from the cabinet. They may use an infrared camera to compare temperature patterns across the exchanger, helping locate thin spots or blocked flow areas. A technician also checks the blower, supply plenum, and return grille to confirm airflow patterns do not force hot gases against the exchanger. Correct airflow reduces thermal stress that can open existing cracks over time.
Pressure and venting checks come next to confirm exhaust leaves the house instead of lingering near the exchanger or re-entering the system. Technicians will test draft at the flue and may perform adjustments similar to a flue draft tuning procedure to verify proper flow. They inspect vent joints, flashing, and terminations that affect pressure dynamics and note any backdrafting evidence. Proper draft helps prevent combustion products from leaking through minor exchanger faults into living spaces.
When further confirmation is needed, a professional may recommend targeted tests such as a smoke test or combustion analyzer readings to detect leaks of combustion gases. They will document readings, photos, and observed symptoms in a written report to support next steps and homeowner decisions. For homeowners in Colleyville, TX, clear documentation helps prioritize repairs or replacement for safety. If the house shows signs of carbon monoxide exposure, follow-up testing is a necessary step and often referenced in guidance about exchangers gone bad.

When To Call A Professional For Heat Exchanger Inspection
Call a professional promptly if you detect symptoms that suggest combustion leakage, such as exhaust-like odors or occupants feeling dizzy. Describe the symptom timing and which rooms are affected so the technician can prioritize diagnostic checks. A pro will know to bring combustion testing tools and safety gear to confirm whether the exchanger allows gases into the living space. If you notice staining or new soot near vents, contact an HVAC technician immediately for a focused safety check.
Schedule an inspection before the heating season if the furnace shows performance changes like frequent short cycling or irregular burner operation. Technicians will inspect combustion stability and may adjust gas inputs as part of confirming safe operation; see a typical gas pressure adjustment procedure for context. Early seasonal checks reduce the chance of hidden exchanger deterioration becoming an emergency during cold weather. For Colleyville, TX homeowners, addressing these signs before heavy use helps avoid exposure risks.
If a carbon monoxide alarm activates when the furnace runs, treat that as urgent and call a qualified technician without delay. The technician will perform direct combustion gas checks, measure draft at the flue, and visually inspect exchanger seams to locate possible leak points. They may also recommend turning off the furnace until tests confirm the unit vents correctly and maintains safe combustion. For ongoing concerns in Fort Worth, TX properties, documented inspection results support safer next-step decisions.
Request professional inspection when you see physical changes near the furnace cabinet, such as new cracks, rust flakes, or loose mounting hardware. The inspector will check mounting bolts, blower balance, and exchanger access panels to determine whether mechanical stress contributed to damage. They will document findings with photos and written notes so you can choose repair, monitor, or replace based on clear evidence. Always follow the technician’s safety guidance if they advise limiting furnace use until repairs finish.
Repair Options And Safety Steps After Inspection
After an inspection finds damage or risk, technicians usually outline repair options that prioritize occupant safety and code compliance. Repairs can range from targeted seam repairs to replacing badly cracked sections, depending on defect location and severity. A professional will explain how each option restores the barrier between combustion gases and the air handler. For Colleyville, TX homeowners, following the technician’s safety recommendations protects family members and neighbors from exposure risks.
- Replace the heat exchanger when cracks are widespread.
- Repair seams or welds when damage is limited and accessible.
- Address related burner or venting faults that caused the damage.
- Temporarily disable the furnace if tests show active combustion leakage.
Technicians also recommend specific safety steps to take immediately after inspection when a hazard exists. They may advise shutting off the furnace and opening windows to ventilate until repairs complete. If occupants have symptoms like headache or dizziness, professionals will recommend seeking fresh air and medical attention as appropriate. Fort Worth, TX residents should follow these steps without delay when combustion leakage is suspected.
A professional will confirm the chosen repair by retesting combustion gases and draft after work completes. They might use a combustion analyzer, smoke test, and recorded photos to verify the fix and document results for your records. Proper rechecks ensure that sealed seams and repaired sections no longer leak into the airstream. Ask the technician for a written report showing the tests and results to keep with your maintenance records.
Some repairs need follow-up actions to prevent recurrence and keep occupants safe over time. These steps often include correcting venting, balancing airflow at the blower, and tightening mounting hardware that caused stress. A technician may also test safety switches like the flame rollout switch to ensure they operate correctly after repairs, as part of overall system protection. If ongoing monitoring is recommended, schedule periodic inspections to confirm the exchanger remains sound.
Preventive Maintenance To Protect Occupants And System
Regular tune-ups reduce stress on furnace parts by keeping burners adjusted and blowers balanced, which helps limit metal fatigue that leads to exchanger problems. A technician will clean combustion components, remove soot, and verify airflow through the evaporator coil and supply plenum to reduce hotspots. Simple seasonal checks also include tightening mounting bolts and inspecting access panels to prevent vibration-related damage over time. Scheduling these tasks on a routine basis catches small issues before they grow into hazards for occupants.
Monitoring indoor combustion indicators complements physical maintenance by helping homeowners spot problems early, such as new exhaust smells or unusual humidity near the furnace cabinet. If those signs appear, professionals can perform targeted tests like smoke checks and combustion readings to confirm whether leaks exist. For properties in Colleyville, TX, regular attention to these cues shortens the time between defect onset and corrective action. Homeowners should keep a log of observed symptoms and service dates to inform the technician’s diagnosis.
Maintaining venting and flue integrity is a key preventive step because proper draft prevents combustion gases from lingering near the exchanger and reduces corrosion risk. Technicians will inspect vent joints, seals, and terminations and recommend resealing or realigning sections showing gaps or movement. They may also advise on keeping outdoor terminations clear of debris and ensuring adequate attic or crawlspace access for future checks. These practices preserve safe exhaust flow and lower the chance of backdrafting into living spaces.
Adding routine safety tests after maintenance verifies that repairs or adjustments prevented leakage and restored safe operation for occupants. A follow-up inspection often includes combustion analyzer readings and a pressure/draft check at the flue, with results recorded for homeowner records. If there remains any concern about carbon monoxide exposure, technicians can arrange formal testing such as carbon-monoxide testing to confirm safety before normal use resumes. Maintaining a schedule for these checks gives homeowners in Fort Worth, TX confidence that their system continues protecting occupants.
Frequently Asked Questions
What does a Heat Exchanger Inspection include?
A Heat Exchanger Inspection examines the exchanger for cracks, corrosion, metal fatigue, and visible deformation that can leak combustion gases. Technicians check burner operation, flame pattern, and venting to confirm complete combustion and proper exhaust flow. They often use a combustion analyzer or infrared camera and perform a pressure or smoke test to verify integrity. If a crack or carbon monoxide risk appears, stop operation and contact a qualified professional immediately for repair or replacement.
How can an inspection detect carbon monoxide risks?
During a Heat Exchanger Inspection, a technician visually checks the exchanger for cracks, rust, and soot that can allow combustion gases to leak. They run the furnace and measure flue gases and draft to confirm combustion products travel out the vent, not into the home. If instruments or visible signs suggest carbon monoxide, the inspector will advise immediate shutoff and recommend evacuation until a professional resolves the leak. Carbon monoxide is dangerous, so contact a qualified HVAC technician right away for testing and repairs.
What signs should prompt an immediate inspection?
Look for soot or cracks on the furnace cabinet or visible parts of the heat exchanger, and schedule a Heat Exchanger Inspection immediately.
How do technicians confirm heat exchanger leaks?
Technicians begin a Heat Exchanger Inspection by visually examining the exchanger for hairline cracks, rust, or warping near welds and seams. They run the furnace briefly while watching flame patterns and checking for unusual smells that suggest combustion gas escape. Technicians use a combustion analyzer and a handheld gas sniffer to detect elevated carbon monoxide or combustion byproducts, confirming leaks. If tests suggest a leak, they caution occupants to leave and recommend a professional service call for repair or replacement.
When is replacement recommended after inspection?
Replacement is recommended when an inspection finds cracks, significant corrosion, or warping that could leak combustion gases into the home. If a Heat Exchanger Inspection shows visible cracks or metal thinning, the technician will flag replacement. Do not continue to operate a gas furnace if inspectors suspect a breach; this poses a carbon monoxide risk and requires immediate professional action. A qualified HVAC technician will confirm with pressure or combustion testing and provide a written recommendation for replacement.